It’s Critter Time!
Finally, things are beginning to come together – on all levels. I have finished the applique process for all six “Critters” and here is what they look like up on my design wall each patiently waiting to be squared into 10″ blocks.
You can review my applique process here or use Erin’s technique used in the original pattern here.
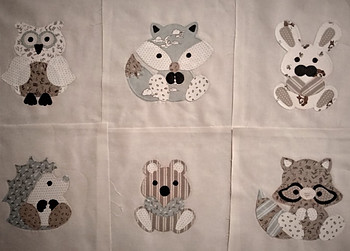
The image above was not taken using a light box or proper lighting of any kind making the colors appear very washed out so I’ve added a slightly better image below to show the fabric’s truer colors.
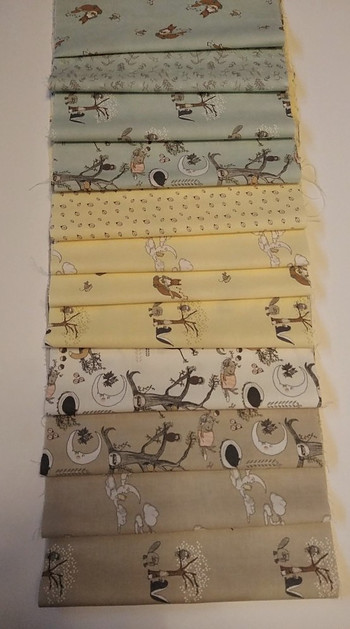
I don’t recall my thought process (over 2 month’s ago) when I first began to choose colors for the applique critters but I’m now I am noticing I didn’t use any of the yellow background fabric at all. However, it will be used to piece the disappearing 4-patch blocks. Let’s hope (fingers crossed) when it’s all put together it still looks OK!
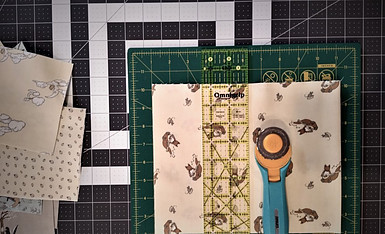
This particular pattern calls for only four basic fabric cuts: 10″ squares, 5 1/4″ squares and strips: 1 1/2″ x 25″ and 2 1/2″ x 25″. A large cutting mat is helpful if you happen to use cuts of fabric larger than a fat quarter. I found using my 12″ rotary cutting mat, a 12.5″ x 2.5″ ruler and rotary cutter to be the only tools I needed.
Each of the 12 fat quarter pieces of fabric is just the right size to yield the exact number of squares (2) and strips (2) needed of each pattern. There won’t be much fabric left over but it will be more than enough for use in the appliques.
When to Deviate From the Original Pattern
1) The original pattern indicates cutting each 1 1/2″ and 2 1/2″ strip 20″ long. I cut mine 25″ in length. Doing a little math I noticed the 20″ length may not be long enough to cut all the segments. If (4) separate segments are to be cut 5 1/4″ long – those four segments alone equal 21″ and you still need another 3″ in length to be able to cut the (2) 1 1/2″ segments.
2) The original pattern also calls for white strips to be used for the sashing. This would be a perfect color choice if paired with fabrics of a bright or primary colored hue. The Hushabye Hollow fabric line is softer with an undertone of yellow so I chose to use fabric solid from my stash – Boundless Fabric in Porcelain.
Have you ever deviated from a pattern’s original instructions? When and why did you feel this was necessary?
Note: Any time I run across a sale on solid fabric in white, off-white, gray or black I buy up a generous amount. Pairing these neutrals with fun prints or using them as a background, in my opinion, makes a huge impact in the appearance of a finished quilt. These are colors that will be used – sooner or later – so it’s never money wasted!
What fabrics can you not resist the urge to pass up?
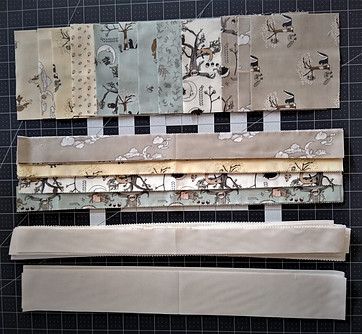
The fabric squares and strips needed to begin the disappearing four patch blocks are shown below:
Keeping Focus on the Process
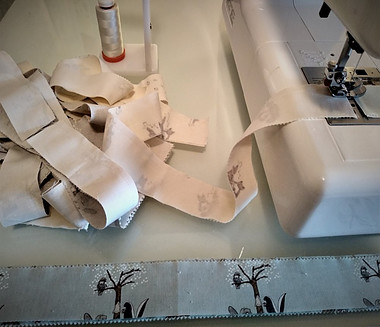
Once again, we are at a point where things begin to take off. To make the process even speedier I use a technique called “chain piecing”. I pair a solid strip with a print strip – right sides together and sew a 1/4″ seam along the full length. Reaching near the end of that strip I begin to feed the second pair under the edge of the presser foot. This is done without cutting any thread between the paired strips.
This is how these strips look about half-way through the process. Looking to the far right of this image you can see how each succeeding strip is fed under the foot immediately after the one preceding as part of the “chain piecing” technique.
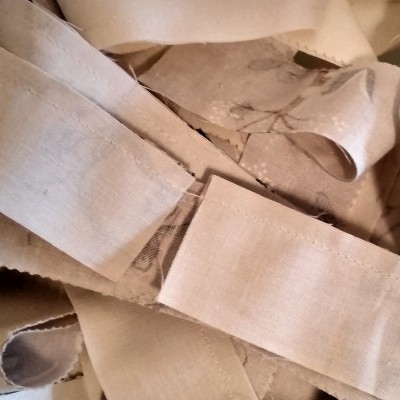
Below is a close-up of the threads creating the chain:
More Cutting and Sewing Fabric Back Together
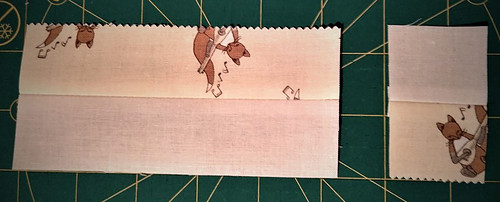
Once all strips are sewn and the seams pressed open time to once again bring out the rotary cutting board and cut each strip set into (4) 5 1/4″ and (2) 1 1/2″ segments. The image below shows one of each segment:
On the subject of cutting I would like to end Part 2 to review a few basic techniques to keep in mind when using a rotary cutter and mat.
If you have never used or have little experience with this type of cutting first off, it is mandatory that you have these three items:
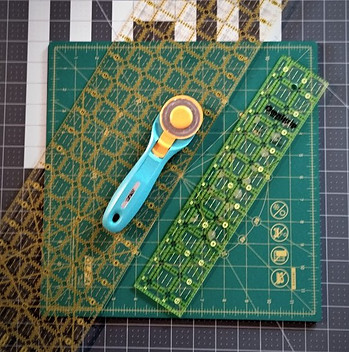
1) A Cutting Mat designed for use with a rotary cutter.
Cutting on any other surface than one designed for use with a rotary cutter will ruin that surface. It is up to you whether to use a mat is self-healing or not. A self-healing mat will allow the marks made with a rotary cutter to “heal” or smooth over giving the appearance of having never been cut. These will cost more but will last so much longer.
2) A Rotary Cutter
There are many rotary cutters on the market with metal blades of varying diameter.
The smaller 18mm and 28 mm diameter blade is small enough to easily cut wavy lines and small circles.
The medium (most popular) 45mm diameter blade is suitable for cutting larger sized curves as well as cutting 1-4 layers of fabric in a straight line.
A larger 60mm diameter blade is great for cutting thicker fabrics or additional layers of fabric at once.
EVERY time you use a rotary cutter always cut in direction only. Start at a point closest you and cut away and if a couple of threads were missed do not roll the cutter backward. This causes the edge of the fabric to fray and shred making it impossible to line up the edges of fabric to trim or sew.
3) Quilt ruler
A straight edged ruler with grid lines is essential. There is no other way (by hand) to get an accurate or near accurate cut of fabric without using a ruler as a guide. A nice middle of the road size is 3″ x 18″ and bigger is better. There is nothing more frustrating or impossible than trying to use a ruler 12″ in length when you need 18″.
While I return to my quilt project – cutting and sewing together more pieces of fabric, I’d love to hear your thoughts! What is your favorite sized ruler and why? Do you feel self-healing cutting mats are necessary or is a regular mat just as good?
If anyone has used this fabric line – Hushabye Hollow by Lydia Nelson for Moda Fabrics or made a quilt using the pattern Woodland Critters by Avery Lane please post a link for us all to see!
Wow, you are really talented and I love how you talked us through the process to show just how much work is put into making something I like this and you hadn’t even finished at the end of the article, there is still another part to come!
I see things like this posted all over the place but seeing how its made really makes me appreciate them even more.
Thank you Hannah! The purpose of my site is to let those who want to make a quilt know that there is nothing to fear yet, at the same time I want people to be as informed as possible about the process. I too see images of quilts and quickly think, “that will be easy to make”. Then I purchase the pattern, gather my fabric and quickly realize that even this ‘easy’ quilt is going to take more time than I thought!
Thanks for stopping by!