Pellon Shape Flex interfacing vs Everything Else Out There
Over the past couple years I’ve read many tutorials and watched several videos each describing the various techniques for creating a pattern to be attached – or appliqued – onto fabric.
For every technique available, there are an equal number of associated pros and cons.
For this quilt I’m taking from a variety of different techniques and I am curious to see how well this technique works out in the long run.
Most people like to use double-sided fusible webbing or interfacing to reinforce the individual applique pieces. It makes perfectly good sense as this inner layer (the webbing or interfacing) will be sandwiched between the background fabric of the quilt underneath and the fabric applique on top. “Double-sided” implies doing four tasks in two steps however, my experience with this type of interfacing is one of added steps and added time and added frustration. Certainly there are instances where this product is preferred but I didn’t feel this particular project was one of them.
Double-sided or other more densely woven interfacing are great when you not only need to reinforce appliqued fabric but when it is more desirable to have substantial stiffness or structure – like on a tote bag or garment.
I chose Pellon Shape Flex because it has the perfect degree of flexibility, or hand. It gives the appliqued pieces increased strength and structure but it isn’t too
stiff. With this type of quilt I wanted to make sure the appliqued blocks would fold and drape as easily as the surrounding pieced-only blocks.
When I discovered Pellon Shape- Flex about a year ago I immediately fell in love with it and it has become my #1 go-to product for interfacing. It is a little more expensive than many of the other
products out there, but the linen texture is heavenly to work with.
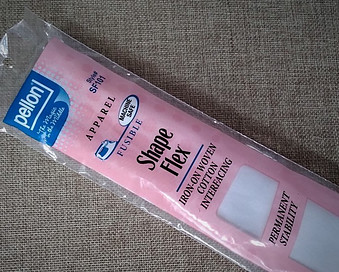
Below I will show exactly how I made each “Woodland Critter” applique:
Materials List
2) Fabric
3) Shape Flex woven interfacing
4) Clear glue stick
5) Iron
6) Sewing machine
Step – By – Step
Step 1 – The Pattern.
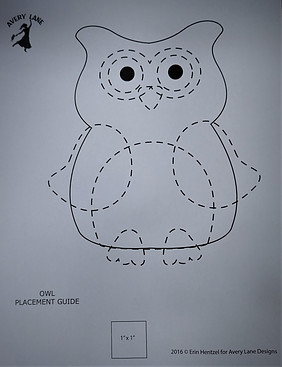
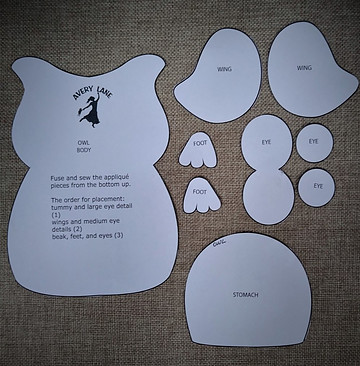
Purchase and download the pattern Woodland Critters from Avery Lane. Once downloaded, print off the templates for each critter and then cut out all the shapes.
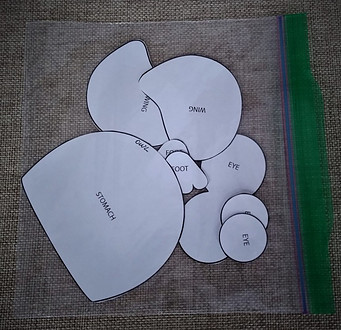
To keep things organized I put every shape for each critter into a zip lock bag. A couple of the animals have many small parts that are very easy to lose.
Step 2 – Decisions, Decisions.
This is probably the most difficult of all – deciding which fabric to use and where. To make sure each element of the design stood out I tried to alternate each layer with a contrasting color. It does look good however, when it comes time to sew, you will be changing the thread color many times. If you’re in no hurry and have the patience, I’d go this route. (The route I’m taking although I don’t really have the time and patience as the baby this is for arrived a month early and is already here!)
Alternatively, use a fabric where all top stitching can be done with one color or maybe only two different colors. I suppose it is possible to use clear thread. I personally have no experience with clear thread – I may get wild and adventurous one day and give it a try. When I do I’ll let you know how it works out!
The description for this next step is somewhat wordy but I’m including photos to help clarify any confusion. Because I choose to use Shape Flex interfacing my technique may appear complicated but once you go through the process you’ll find it is quite simple and doesn’t require a lot of time-consuming measuring and attention to detail.
Step 3 – Fusing the Fabric to the Interfacing.
Once you have decided what fabric to use for each critter as well as the other shapes it’s time to fuse the Shape Flex to the fabric. No exact measurements need to be done here but to prevent wasting too much fabric or interfacing, you will simply cut out a piece of fabric slightly larger than the finished size of each applique piece.
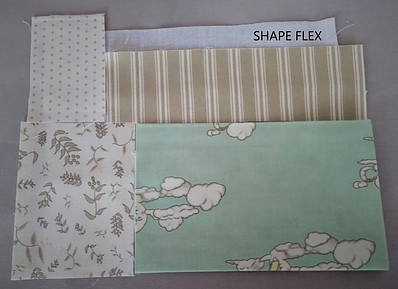
Unroll a length of Shape Flex interfacing large enough to cover several pieces of fabric. Lay the wrong side of the fabric on to the sticky side of the interfacing making sure each of the fabric pieces touches one another and there are no spaces in between. This prevents having any areas of interfacing from being exposed and from sticking to your iron as you fuse the fabric to the interfacing. For extra measure you may want to extend the fabric about 1/4″ beyond the edge of the interfacing. In the image below I’ve tried to illustrate how the individual fabric pieces are positioned on top of the interfacing and how the dotted and striped fabric pieces extend a bit beyond the edge of the interfacing.
What you end up with is one large piece of fabric with an attached interfacing. Treat this as you would any other single cut piece of fabric.
Step 4 – Tracing and Cutting.
Place the paper template on the fabric and trace around. This doesn’t have to be perfect nor does it really matter if you trace on the right or wrong side because once you have everything traced you’ll move on to cutting out all the shapes. Again, perfection is not required as these edges will eventually be stitched over and completely hidden.
Step 5 – Finding the Middle.
Starting with the large animal piece or base, turn over to the wrong side, locate the center and place a small pencil dash or dot. Locate the center of the 10” square of background fabric and place another dash or dot. You can then use a straight pin to match up the marks to help get the base applique centered on the 10″ fabric square. Lift up one side of the applique and using a glue stick lightly glue the applique to the back. If I want to be exact with the center placement I will use my ironing board as a surface to work on as I have no worries piercing a straight pin into the ironing board cover. For smaller projects I have an 8″ cork board that works very well.
Sometimes “eye balling” the center placement does just as well and using a clear school glue stick allows you to re position as many times as you need to get the base of the design exactly where you want it.
Once the final position is located take a hot iron and press (hold and press down) on top of the applique. Avoid ironing (moving iron back and forth) as this may cause applique to move out of
position.
This will securely baste the animal shape to the background fabric allowing you to sew or top stitch around the shape without shifting or having to use pins to keep it in place.
Returning to the quilt pattern instructions, layer the remaining pieces as instructed until all pieces are used and the result is a completed “Critter” appliqued onto the 10” square of fabric.
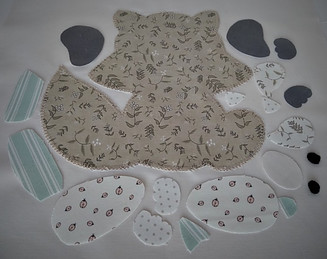
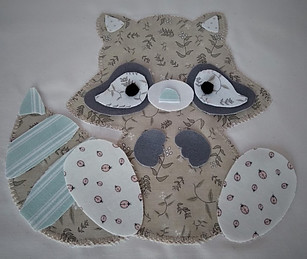
Repeat this same process for the remaining five “Critters”.
Stay tuned for the next post where we begin to piece the different rows alternating a four-patch block with the appliqued square.
Oh my, very nice. Thanks, Susan, great job.
I am a very craftsy (if there is such a word) person and have often wondered about the world of quilting. SO happy to have found your site. Do you have any recommendation for an easy book to learn the art of quilting, like a quilting 101 book guide? Or have you even considered creating your own? I would be interested, as I am sure many others like me.
Your instructions are very clear and you did not lose me in all the trimmings…lol. I do sew a bit and I am familiar with iron-on interfacing and how to use it – I usually use it for hemlines and cushions – depending on the fabric weight and the effect I am trying to create.
I will try this and thanks for sharing your expertise. I will come back and visit.
Michelle
Hi Michelle
Thank you for your sweet comments!
When it comes to quilting books Pat Sloan is a quilter I have followed for years. She has a book, “Teach Me to Make My First Quilt” that may be of interest to you.
Jenny Doan, owner and founder of the Missouri Star Quilt Company has hundreds of short YouTube videos that are a great source of inspiration. She has a way of simplifying any pattern and making it look very doable.
Hope this helps!
Susan
Not exactly a work for beginners 🙂
The description of how to apply the the techniques is written so easy to understand that I’ll give it a try.
I’ve worked with shape flex before though and find it most convenient. Your patterns are very pretty and I want to check that woodland site too 🙂
Hi Stefan
Thank you for stopping by!
While making this quilt I found the applique process to be the easiest. It was time consuming but it wasn’t until I started piecing the remainder of the top that I began to question the pattern instructions – I felt there had to be a better an easier way.
My next Woodland Critters quilt may be just a series of appliqued blocks!
I love Quilts. I love the history of how quilts are woven into the history of our country. I’m afraid, however that I would not be a quilt maker. I wouldn’t have the patience. . I enjoyed reading your article, however I have to confess that I understood very little of the detailed instructions you gave for the quilt top. For those that know the process and the materials it would seem to be understandable. Your article is very concise and well-written. I liked the way you stopped the article right at the spot of high interest-which leaves the reader wanting more-so she will be sure to look for your next installment.
Hi Barbara,
Thank you for your comments! Quilting does require a little patience but after some practice, it has become my refuge. Cutting fabric and sewing it back together allows me an opportunity to think and solve many world problems!