
If you are like me when the quilting/sewing/I-have-to-make-something bug hits it usually happens when I’ve eyed a stunning quilt or located a new fabric line, my first thoughts – “I need to make that” or “I have to make something with that fabric”.
Like many worthwhile things in life, quilting is not always so quick and easy. Even patterns and kits labeled as “Quick” and/ or “Easy” omit the preparatory steps that make the difference between finishing that quilt top or turning that pile of fabric into another UFO (UnFinished Object).
The goals here is to show you, step by step, the 5 basic techniques, when followed, will eliminate mistakes, do-overs, wasted time and money. There may be a bit of time expenditure in the beginning but in the long run, these techniques will allow you to successfully begin and complete every quilt top you attempt.
Step 1
– Have the Right Tools
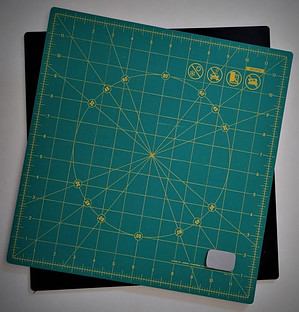
This includes a cutting mat in TWO different sizes. If you don’t have one already this is the time to go ahead and bite-the-bullet and get a large 24” x 36” self-healing rotary cutting mat. It may seem like over kill but trying to make do with anything smaller will lead to nothing but frustration and second trip to a brick and mortar or online store to purchase
one. (If some reason you purchase this and find you never use it contact me and I’ll be happy to buy if from you!).
The second mat is a smaller 17” rotating cutting mat. I have found I use this A LOT especially when piecing half-square triangles and squaring any block 10” and under. Once you start using it you will want to use it every time you make a cut!
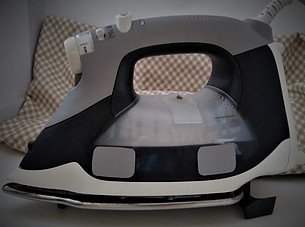
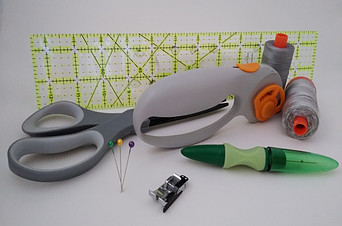
Other tools include a good iron and ironing surface, a rotary cutter, scissors, a quilting ruler (a 2 ½” x 12 ½” is a good size to start with and the one I find using about 85% of the
time!). For the sewing machine, I have found the ¼” presser foot something I cannot live without. When it comes to thread – so many types and colors but start with a good 100% cotton 50 wt. thread in a neutral color (white, light and/or medium gray and black).
Step 2
– Cut ALL Pieces Accurately
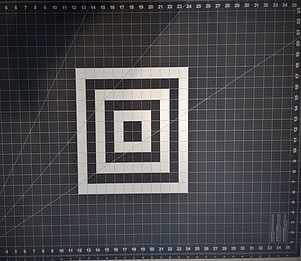
When you have the right tools – large enough cutting mat, rotary cutter and ruler – this is easier than you think. However, cutting with these tools is much different than cutting with a pair of scissors. My suggestion would be, before using the fabric you have chosen to piece your quilt top, practice making accurate cuts with scrap fabric – old bed sheets or pillow cases work very well.
Begin by taking a piece of fabric approximately 12” square and laying it on the large cutting mat. Then using your rotary cutter and ruler practice cutting 10” squares. This is a good time to try out the rotary mat. Place a 10” squares on the mat and using your ruler, cut this square into (4) 5” squares. You will be making one cut right down the middle then without moving the fabric, turn the mat instead and make another cut down the middle. Next, using the same technique (cut, rotate, cut, rotate), cut the 5” squares into (4) 2 ½” squares.
When you are finished you will not only have squares of fabric that could be used as a background for a many quilt top projects but have learned the math used and the time taken to make pre-cut fabric bundles! Which lead me to the next strategy:
Step 3
– Use Precut Fabric
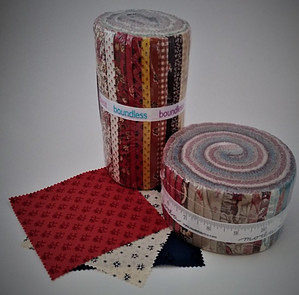
After making the above cuts it will seem obvious what a time saver it is to use pre-cut fabric however, there are a couple of down-sides. The first being the fabric design itself. You may have a wonderful quilt pattern that uses 2 ½” fabric strips but the fabric you want to use is not available in this cut. So, what you do is make a couple of decisions. Is your time more valuable than the design you want to create? If so, are you willing to compromise and choose a fabric in the precut size you need?
Step 4
– Sew a Consistent Seam Width
At this stage consistency and accuracy go hand in hand. You ‘ve measured twice, cut once and have arranged the pieces to be sewn together. THE thing that will ensure your pieces line up correctly is sew each seam the same width. Typically, a seam is ¼” from the edge – the reason for using a ¼” presser foot. It has a little “fence” along the right edge. When you keep the edge of your fabric against this “fence” the entire length of every seam will be the same. For some reason, these plates (at least on the machines I’m familiar with) do not have a ¼” marking and I have found I cannot sew an accurate seam without one!
There is nothing wrong with sewing a 3/8” or even a ½” seam allowance and if you choose to do so, most sewing machines have a mark on the needle throat plate that you can use as a guide. What is important, that whatever seam width you choose you use that same width for the entire quilt top.
Step 5
– Iron Seams to the Dark Side or Open?
I realize what I’m about to say could lead to an open invitation from the “quilt police”! Pressing your seams before moving on to each subsequent step is almost as important as the sewing itself and no one is going to challenge me on that however, when it comes to “how” to press those seams there are differing opinions.
In the past, it was necessary to press both pieces of fabric to one side – typically to the “dark” side. This served two purposes: 1) the darker fabric was used to help hide the fabric at the seam and 2) closed the seam to prevent the inner layer of batting from working its way through the seam.
Today, the batting that is used is somewhat denser and of higher quality and our quilting techniques have improved – most of which is done my machine.
As result, out seam pressing techniques can also be modified a bit. I like to press all my seams open – yes, I said it…ALL seams open and here is why. Many quilt patterns that incorporate a variety of shapes and sizes – points in particular – are so much easier to work with when the seams are open. Closed seams create a huge amount of bulk at the points where the pieced points meet. Sometimes there so much bulk it is hard to get a machine needle through it and if you do, when it’s time to press, the seams will not always lay flat. This unsightly bulk never goes away. It’s still there when it’s time to quilt and still there after the quilt is bound and finished.
Since this article is about piecing strategies for instant success – getting things right the first time – I’m sticking to my guns and suggest, at least for now, you press all seams open. When time allows and you are feeling adventurous, try pressing all your seams to one side (or the dark side) and see what you think. There are certain quilt top patterns where you may find it best to use both techniques!
If anyone has other – better – tips and techniques feel free to share in the comments below!
Susan
I have always wanted to learn how to quilt, and your post really explains it in a way I can understand. So happy I came across this iny search online for beginning quilting. I am going to print this out for the step-by-step directions and thank you for such a great site! Have bookmarked it for future reference!
I’m so glad you found this helpful. If I can help you in any way just let me know!
Susan
For someone that has never quilted anything in their life, you really do break it down for a newbie like me to understand. I’ve always admired those that take the time to quilt because it looks like it requires a lot of patience. If I ever decide to get into it, I know exactly where I will be going to learn step by step. Thank you for taking the time to instruct us on how to quilt.
Hi Ralph and thank you for stopping by!
Quilting does require patience – especially when you realize you’ve made a mistake and have to rip out the stitches and start all over. It is during those times that patience is what keeps you from throwing that project out the window!
I am glad you found the instructions easy to understand! That is my main goal – the information provided on so many sites and tutorials are too general. I don’t want the reader to have any surprises and to know as much as possible – the good, the bad and everything in between – before starting a quilt project.
Great pointers to get someone set up in the right way before they jump into a project. I used to sew clothing quite a bit and nothing is more frustrating than trying to get started and then realizing you don’t have what you need. If someone purchases the items you suggest and they realize they don’t need it, it can always be returned. But if they sit down to do their work and don’t have what you suggest, a trip to the store is so annoying at that point! I was wondering how you go about cutting a perfectly square piece. I assume the fabric laying on top of the mat will cover up any markings that are there to help you cut a square. So I’m not picturing in my mind how you can do it accurately. What are your tips and tricks on that?
Hi Lynne,
Cutting a perfect square isn’t too difficult – the best way to start is with a piece of fabric not much bigger than a 5″ square. Using markings on the mat (I would suggest a rotating mat) and a ruler (say 2″ by 12″) and rotary cutter.
I could go on but I don’t think I could create the visual image needed to fully explain this exactly.
This is something that is much better explained with visual images or better yet a video.
YouTube has videos showing various techniques used to cut fabric with a rotary cutter however, many that I have seen can be a bit wordy!
Another great reason I need to start adding video to my posts!
I like how you used the UFO acronym. I have many ufos (haha) laying around. I am into sewing, and can see myself purchasing some of these thing for my sewing basket. I have been trying to get into quilting, but it’s hard go around for me.
What would you say would be the first immediate step to get into quilting. My mom quilts, but it can be confusing for me.
Great review of must needed items for quilting.
Hi Jag!
As long as you have a sewing machine, thread, scissors and – I hate to say this, but a seam ripper (even the seasoned pros who have been sewing and quilting for decades will need to rip out a few stitches now and then!) you have the basics.
To eliminate cutting and measuring you may want to look into a mini quilt kit where everything from pattern and instructions to fabric is included.
It may be just the start you need!
Hey this was a very interesting article and a lot of information about quilting. I have not done anything like that and it does look really complicated. Quilting could be a nice niche idea and could have an online store up and running if you are good at it so that would not be a bad idea.
Hi Justin,
It’s not as complicated as it looks – more time consuming than anything! An online store would be awesome but that’s way in the future!