A New Year, A New Month and a New Top 5 Quilting Tips and Techniques for ALL Quilters From Beginner to Experienced
Interesting how a New anything can spark renewed interest and motivation to “get things done”!
One of the things I intend to “get done” is writing more articles about the process of quilting, sewing and applique as well as a multitude of associated interests that appeal to those of us who like to make and create anything.
With so much information “out there” I have found it all too easy to get distracted and fill my blog posts with content that features other’s accomplishments. Oh, I’ll continue to do that however, I feel I should be devoting a greater portion of my articles showing you what I have learned during this past year. This includes sharing with you what I consider my all time favorite, go-to tips and techniques that I use every day with most every project.
Quilt Tip #1:
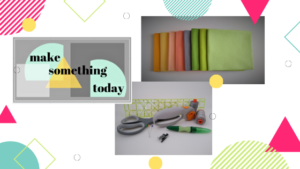
Let’s begin with quilting fabric. For the beginning beginner and even the intermediate beginner, pre-cut fabrics are the way to go. The best and easiest pre-cut fabric to start with are the 5″ charm squares as shown in the image below.

The collection shown above has a wide variety of coordinating prints and solids = fun!
Why Pre-Cuts?
There are TWO techniques that must be done with as near perfect accuracy as possible in order to successfully piece a quilt top.
The First Technique: Making sure EVERY piece of fabric used in the quilt top is cut ACCURATELY
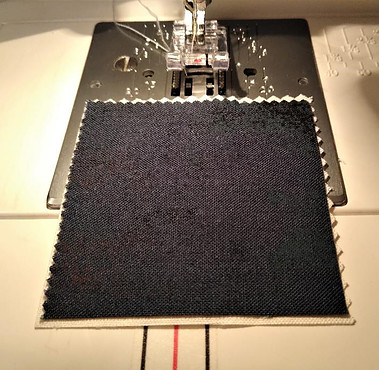
In the image above, the white square is slightly larger than the blue. If you are doing straight sewing this is no big deal. In the world of quilting however, it is a big deal as this discrepancy is the beginning of a huge snowball effect that cannot be corrected at any point down the line.
Cutting accurately, even for the experienced, is often much easier said than done but using 5″ pre-cut squares eliminates that worry altogether. To ensure your cut fabric pieces remain accurate choose a fabric that is 100% cotton with a higher thread count (68 x
68 / sq inch) or look for fabric that is labeled “quilting fabric”. This type of cotton fabric does have some give but it will not
stretch like a polyester or polyester / cotton / spandex blend.
If fabric is stretched when sewn the result will not be a smooth and even edge and uneven edges cannot line up evenly.
Starting with four pieces of square fabric, once sewn together, you are expecting your 4 patch block to look like this:
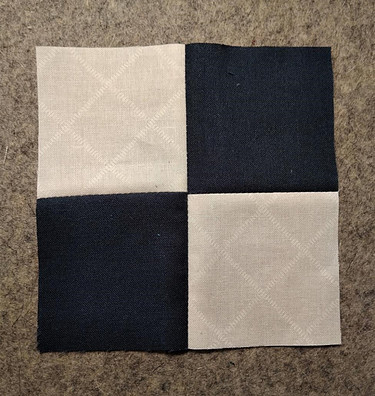
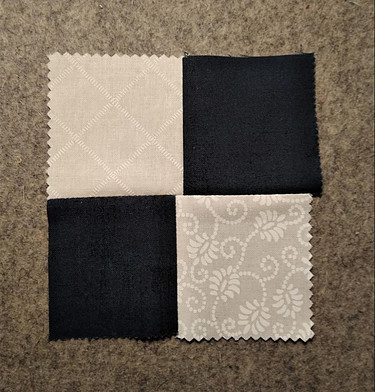
If the first and/or second pair of squares are stretched or pulled while sewing them together, you will still have a four patch block. However, … the points in the center will not match up and it will instead look like this:
Quilt Tip #2
With accurately cut fabric comes the next most important technique for successful piecing:
Making sure EVERY seam is the SAME WIDTH.
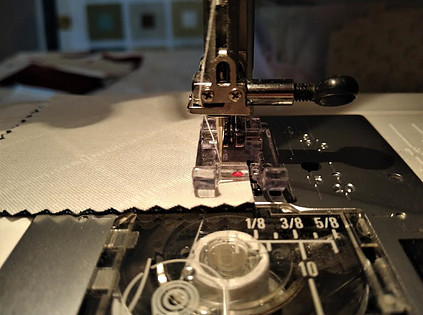
Most quilters choose a 1/4″ seam allowance, others prefer 3/8″ – and for some projects a 3/8″ seam allowance may be preferable. Whatever you choose, just make sure EVERY seam in that quilt top is the same.
One popular technique for achieving a 1/4″ seam allowance can be found in one of my previous posts). However, I have found that moving my needle to #2 position and using the clear zigzag foot, I line up the right edge of the fabric with the opening (just to the right of the red arrow).
I’ve been using this method for about 3 months now and I’ll never go back. My seams are now accurate along the entire length of the seam. Before, I had a tendency to the feed the fabric at the end at an angle making the seam either too wide or too narrow at the end.
Quilt Tip #3
This tip combines the best of both worlds mentioned above: accuracy and using a pre-cut: Try a JELLY ROLL!
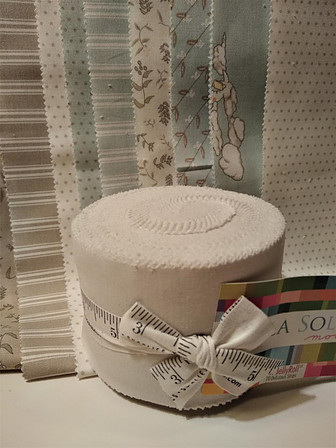
You can see here, here and with my Christmas Quilt that I am also a huge fan of Jelly Rolls (both the fabric and the pastry types – but we’ll just stick with the fabric Jelly Rolls for now!).
This cut typically consists of 40 – 42 strips that are 2 1/2″ wide. The length of each strip is typically the WOF (width of fabric) or 42″ – 44″.
I have used both the 2 1/2″ fabric strips and 5″ squares when I needed to quickly piece together a quilt top and I found piecing and completing a quilt top using a jelly roll was the fastest and easiest.
Stay tuned – my next project is piecing together the fabric strips shown above and adding a fun applique to the quilt top. I can’t wait to post the process and finished product!
Quilt Tip #4
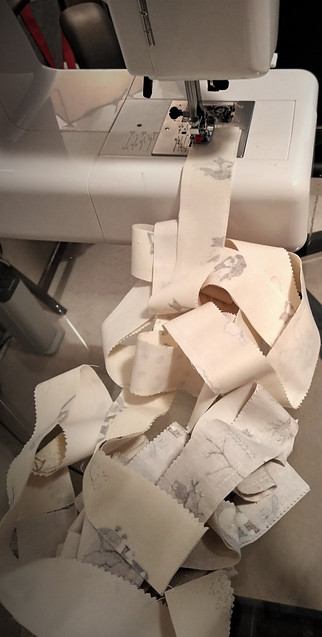
Chain piecing: This is my all-time favorite technique for making quick work out of piecing together a series of shapes such as squares.
Simply position 1 square on top of the other with right sides together and run one pair after another forming a long chain until you reach the end of your pile of squares.
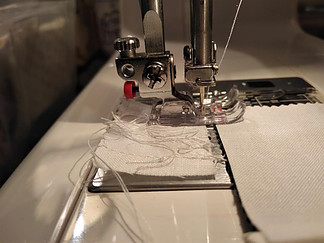
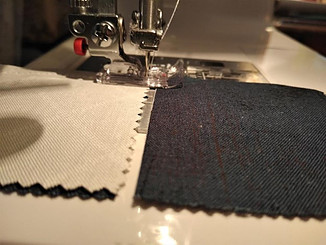
The first image above shows how I like to use a scrap of fabric to start a chain (actually, any type of piecing). This “Leading” fabric allows the fabric to be fed more evenly and prevents the top edge from getting stuck in the feed dog.
And without removing the fabric just sewn, place the second fabric set immediately behind the first and keep sewing!
Before long, you have a big pile of fabric pieces linked together by a tiny thread that is easily clipped apart and ready for the next step!
Quilt Tip #5
Practice:
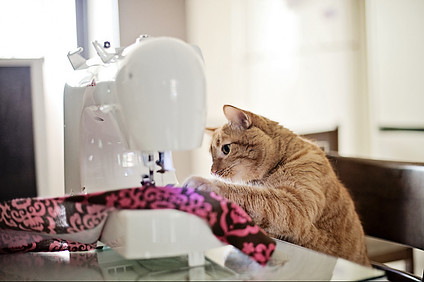
Practice, practice and practice some more.
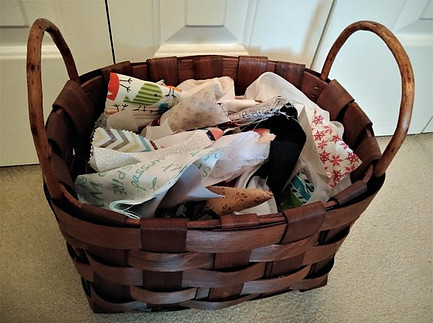
Get out your heap of scraps – even old clothing and practice sewing a consistent 1/4″ seam. Find the technique that works for you and stay with it.
Get out your cutting board, ruler and rotary cutter and practice cutting your own 5″ squares. You need to get comfortable cutting – this alleviate a LOT of stress when you have that 1/2 yard bundle of expensive, hard-to-find, favorite cut of fabric in your hands ready to be made into that unique, one-of-a-kind quilt!
Quilting Success Starts Here
In summary here are my top 5 tips and techniques:
1. Accurate and consistent fabric cuts
2. Accurate and consistent seams
3. Pre-cut fabrics – 5″ Charm Packs and Jelly rolls
4. Chain Piecing
5. Practice, Practice and Practice
Enjoy the process – it is a journey of discovery.
It is discovering what works, what doesn’t work…what you like and what you don’t like…and it’s about making mistakes.
Completely give up on the idea of being perfect when you first start out. You will learn more from your mistakes than from trying to do everything perfect. Those mistakes are not to be avoided but to be embraced as opportunities for learning.
When you are starting out your main goal should be to achieve consistency, not perfection.
Finished is better than Perfect!

Hi Susan,
Thank you so much for sharing these 5 tips 🙂 I have always wanted to make quilt blanket for my cabin up in Lake George. There is something about quilting that makes me feel at ease and at home. 🙂 You are absolutely right! I will use all these 5 tips and just keep practicing. Now I gotta find the right fabric 🙂
Hello and thank you for your comments! Practice is really the key. You gotta make make a few mistakes, learn from them and go on!
Happy Fabric Hunting!
Many thanks to you for sharing such an excellent article with us. Your tips are creative and motivate me to create something new and useful. Thank you for showing the importance of making sure the fabric squares are all the same size. I think this will help me a lot. I also like idea of using pre-cut fabrics such as a jelly roll.
I agree, the TWO techniques – cutting and sewing an accurate seam should be done with perfect precision. When I follow this rule overall, I’m really successful .
Lastly, I hope many others find this article and are able to produce and share their creations and new experiences with you.
Hello and thank you so much for your comments! These tips are only the top 5. Stay tuned, more are to follow!
Hello, I really want to first appreciate your effort in putting this great website together and writing this article. I am amazed at the simple nature of these techniques. The process seems easy to to me and I can’t wait to give a try. These 5 methods are awesome and I would like to share your article with some of my friends. Thank you very much
Hi Benny
Thank you for stopping by and for your comments! I hope you find these beginning tips and techniques helpful. Many people start quilting but don’t stick with it largely because of the mistakes made early in the process. This will lead a person to think they can’t quilt. They can, it just takes time and practice!
Hello Susan,
I hope you’re having a wonderful day. I have no experience in quilting but I have gained some knowledge about it thanks to you.
The pictures do a good job to explain the techniques and the reader is able to visualize how each step is done.
I will be sharing this article with my fiends who do have experience quilting.
Thank you very much.
Hi Michael – thank you so much for your comments!
This is a great post for beginners in quilting offering some useful tips with the choice of images which really help illustrate exactly what it is you are talking about.
The main takeaways for me are to be accurate and consistent especially with fabric cuts and seams and, like anything, to practice, practice and practice some more.
Do you make your quilts for pleasure or do you sell them?
You are indeed, very talented.
Thank you so much for you kind words! The quilts I make are for charity, are given as gifts or just for fun. I haven’t sold one – I’ll be waiting until my quilting skills drastically improve before I do that!
Hi Susan,
Thanks for your post about quilting, I have always wanted to do at least in in my lifetime, it seems so rewarding to put ones own time and personality into. I can see how important it is to follow a pattern and steps to assure all of the squares are precise in order to have the perfect quilt.
Your tips are really informative and I can see how these important steps would avoid a disaster.
One question, is there a particular type of batting used inside the quilt?
I look forward to hearing more about quilting.
Best Regards
Audrey
Hi Audrey and thank you so much for stopping by!
When it comes to batting there are several kinds to choose from however, the batting I prefer is called “Warm and Natural” by The Warm Company. It is 100% cotton, has not been bleached and is free of any harsh chemicals. It is also super soft and so easy to work with.
Thank you very much for this kind of article about quilting tips and techniques. Your post is not only helpful for any beginners but also helpful for experienced one. In your article you have showed us five tips or techniques with picture. I am a beginner in this work sector. I have maintained all your advice while working. I have made myself skillful by maintaining your advice. Every tips helps me a lot.
I am really thankful to you for helping me. I will share your post with my friend. I hope they will be helpful trough it. I hope many people will like your article. They will share their opinion soon.
Thank you so much for your comments. I’m so happy you found this information helpful!