The short answer is YES.
Making a quilt from used baby or children’s clothing is nothing new. It is a great way to preserve those precious memories and hold onto clothing that have a special meaning or significance.
However,…And this is a l-o-n-g however, when making an item such as quilt, using any fabric other than quilting cotton, it pays to first do a little research.
Fabrics typically used for baby and children’s clothing are often Jersey and t-shirt fabrics. These are nice and soft but they also have stretch – a LOT of stretch. This stretching is what creates absolute and total havoc in the quilting process.
How and why?
Stretching of fabric, even a little, it the last thing on earth you want to have happened…no…it’s the one thing you don’t want to have happened at all. If you are following a pattern with rows of same-sized squares, rectangles or triangles with points that need to meet at one point, stretched fabric will not allow this
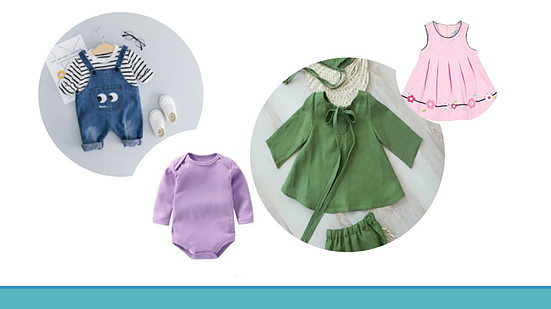
Now, we’ve got the big problem ‘out there’ but we still want to use those cute little onesies that were given by Aunt Martha and the sundress handed down by a favorite cousin.
Right off the top of my head are two possibilities:
Possibility #1)
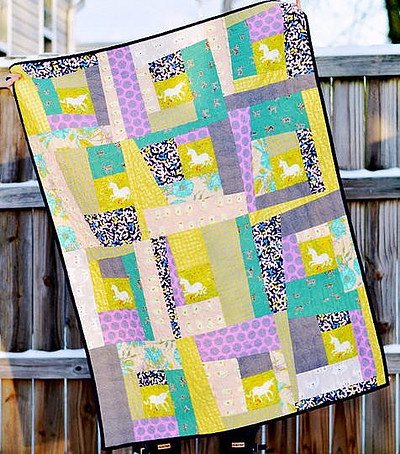
Don’t worry about consistent cutting. Many quilts are made with his technique are often referred to “Wonky” or “Crazy” quilts. All fabric pieces are an irregular shape. The end result is a bit busy but sewing the quilt top is super easy. You don’t have to worry about exact fabric measurements, it doesn’t matter if the seams match up or if the seams are sewn a consistent width. However, you choose to sew the top is up to you – there is no right or wrong! It’s out-of-kilter appearance is what it is supposed to look like.
Here is an example from Fav Quilts
Possibility # 2)
This is probably the direction I would take with a quilt like this.
I would first sort the clothing according to fabric type placing all similar items together in one pile then sort again according to type of clothing (onesie, dress, shirt, etc.) and then by color.
At this point I have determined this quilt will not be a traditional quilt, but a combination of traditional piecing, quilting and APPLIQUE.
With a quilt like this I feel it is not only important to preserve the fabric but the clothing item as well and applique is just one method of doing that.
Let me illustrate what I have in mind:
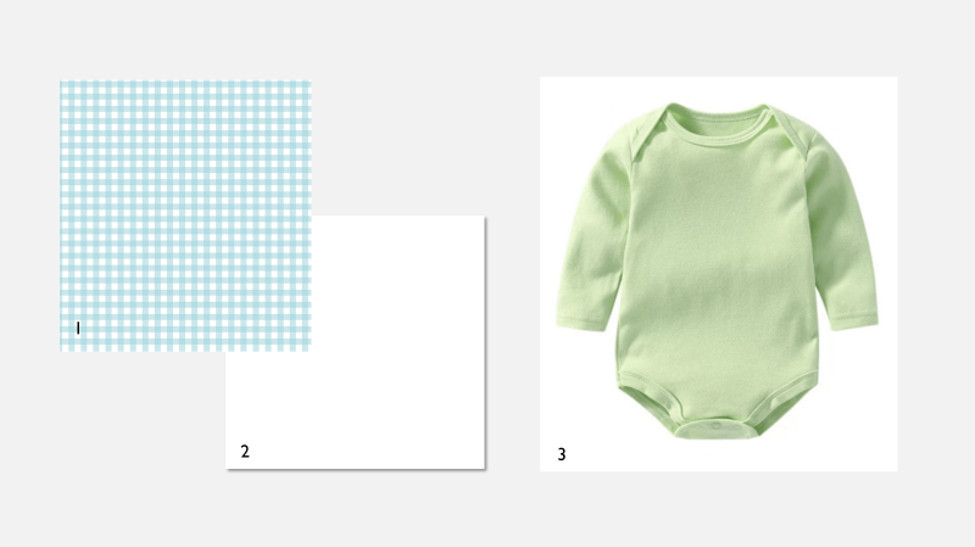
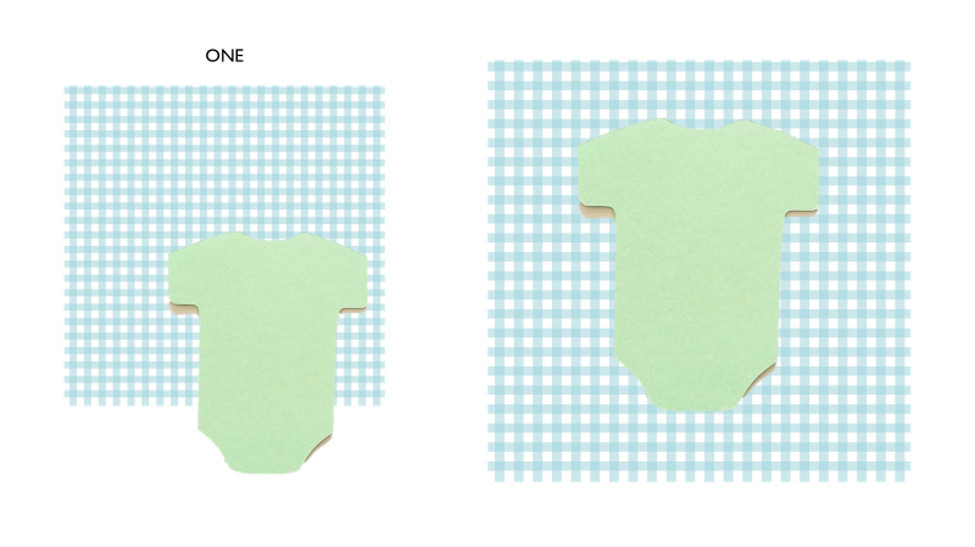
1. And 2. – Examples of background fabrics. #1 is the main fabric; #2 would be optional as you’ll see below.
3. The Onesie used for this block.
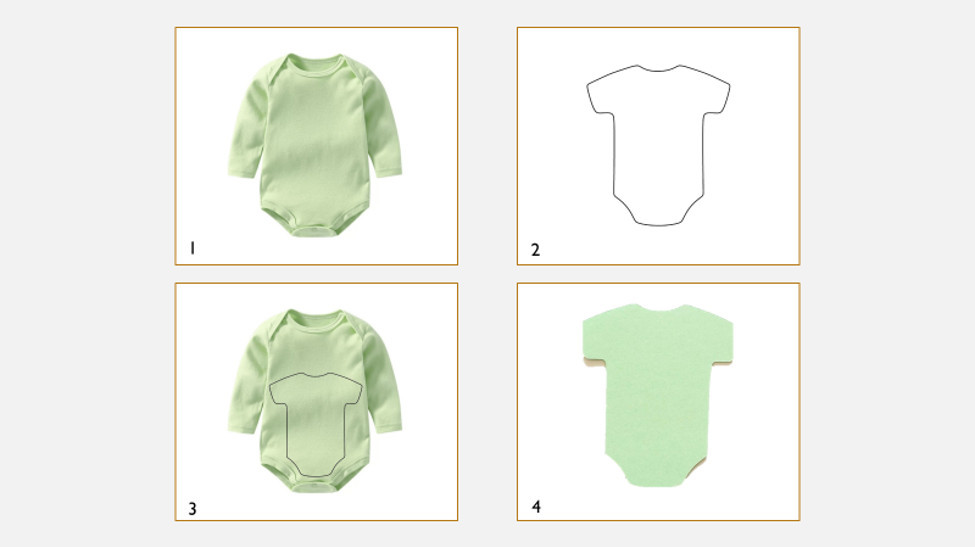
Above is one method of utilizing used baby clothing for an applique.
Trace or freehand a pattern (#2), place it on the onesie and cut (#3). The result (#4) is a replica of the original onesie.
Above is ONE OPTION for Applique. Prepare the green fabric to be appliqued and center it directly onto the background fabric. This would create ONE BLOCK for the quilt.
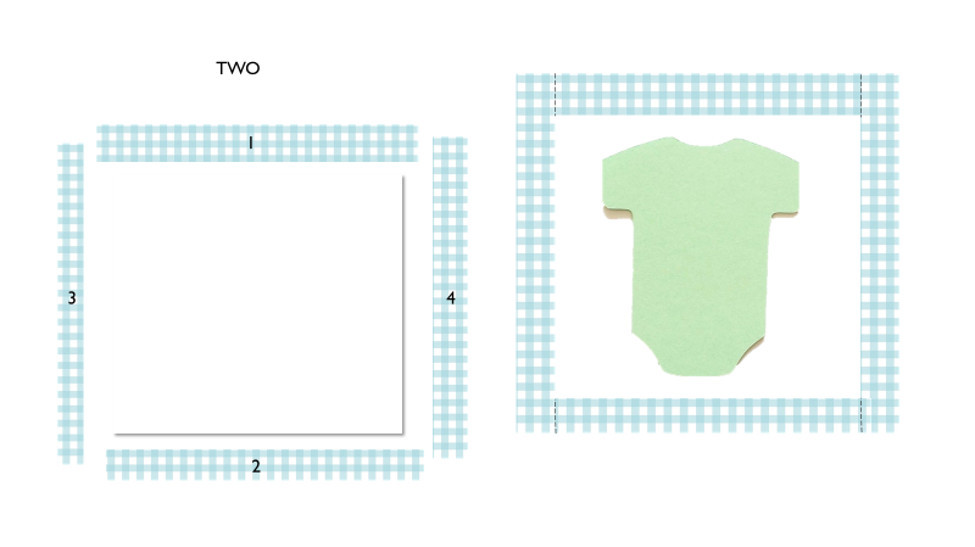
The SECOND OPTION for Applique requires a few more steps but doesn’t require as much of the background #1. Rather than use an entire square of fabric, (and if you have scraps this is a great way to use them!) use strips that are approx. 2″ wide and 4″ or so longer than the length of the white fabric square and sew them as you would a border to any other quilt. (Top, bottom, trim the four corners then sew on the left then right side, trim and press the seams to the print side.
Last step – applique the green ‘onesie’ to the center of the white fabric. This is a favorite technique as most any color contrasted against a white background can really make a design pop!
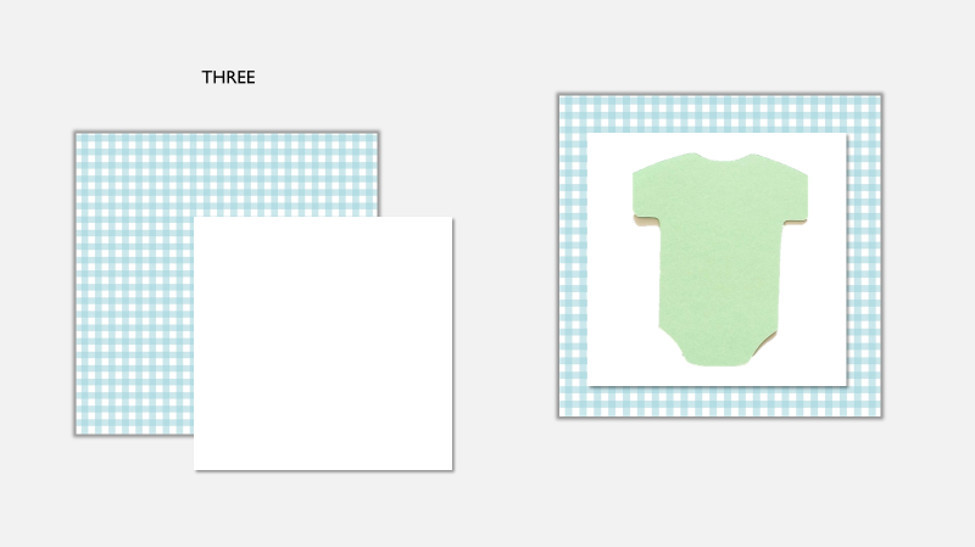
The THIRD OPTION for Applique above is also a very popular applique method. Not as easy as the first but less time-consuming than the second. It simply involves layering or stacking the smaller white square directly in the center of the print. Glue baste and stitch around the perimeter of the white square. Next, glue baste the applique to the center of the white square then stitch around that perimeter.
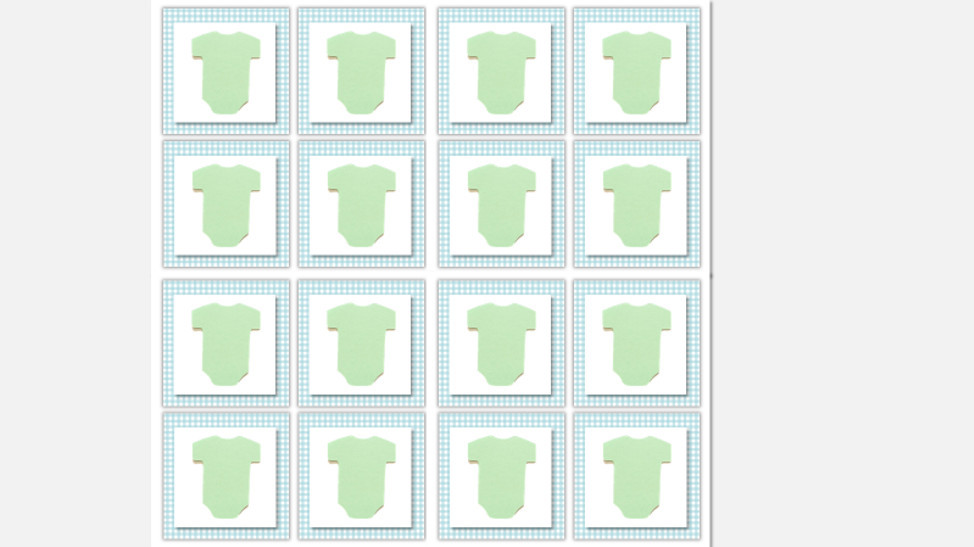
Above is an example of the appearance of the quilt top once each of 16 blocks were assembled and sewn together in rows. Adding a white strip of sashing between each block adds another step but simplifies the process by eliminating the need to perfectly match up each block at the corner.
In the interest of time I simply repeated the green ‘onesie’ in the center of each block. Of course, with a quilt like this you certainly could do that and it would be perfectly OK!
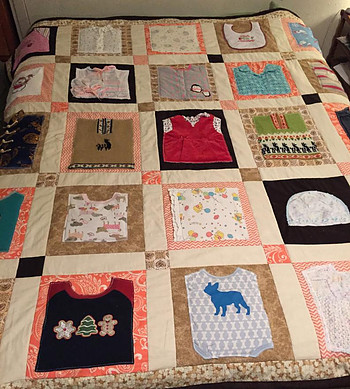
If you want a better idea of what a quilt made from baby clothes could potentially look like, take a look at the examples below:
The children’s actual outfits were used and appliqued onto a fabric of contrasting color. Then, each block was joined by a strip of yellow sashing and corner squares using a print fabric which gives the top greater contrast and visual interest.
Or, this cutie found on Pinterest: (No link other than the one included in the alt text is available)
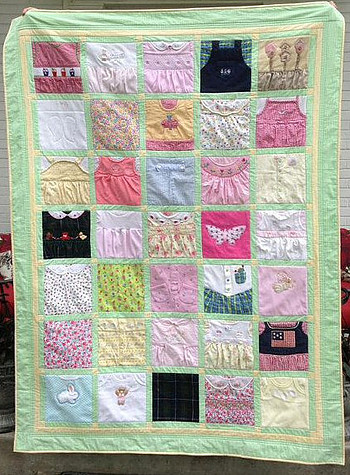
In this example the actual outfits were used as well but they appear to BE the block as opposed to being appliqued to a separate fabric and made into a block – another creative quilt block design.
Or…
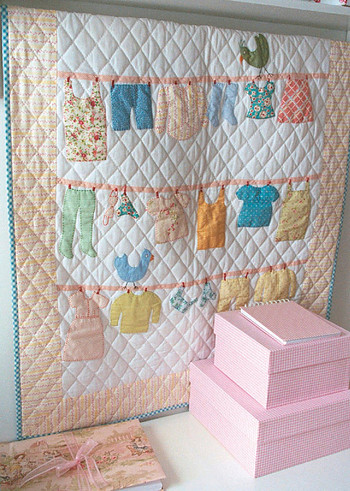
Even this is beauty which is actually a pattern designed by Trish Harper and available in her Etsy store:
I think this pattern could be easily be adapted for use with fabric from baby clothes – however, as is, it is nothing short of stunning. I may have to make this one just for fun!
If this type of project is on your ‘to-do’ list and you’d like more inspiration, for starters, check out Pinterest and Etsy. There is no shortage of ideas and inspiration!
Stay tuned – As more ideas, solutions and techniques occur to me I will post them here as an update or in a future blog post.
If you have ever made a quilt from used baby or children s clothes, I’d love to hear about your experience!
