I’m often asked is what my favorite quilting tool or notion?
The answer can be easy – if I’m allowed to list as many as I want to list or… very difficult if I’m asked to list only ONE. Yikes! Choosing only one really makes me scratch my head.
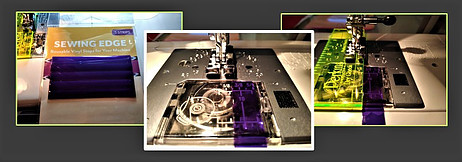
There was a time when I felt once I acquired the tool that enabled me to achieve a perfect 1/4″ seam, (as shown in the image above) and further described here, my search for the best tools and techniques would be over
Quilting requires more than one notion or tool. And as I stated in an earlier post, it really takes, at minimum 10 tools to easily and successfully make a quilt. This post also lists my Top Five Techniques that, along with the tools mentioned will get you off to a good start.
You will also notice, this article was published almost FOUR years ago! A lot has changed since then. Hundreds of new tools and notions are now on the market (some good and others not so good but that subject is for another day).
During this time I have watched hundreds of videos and attended Quilt Festivals and classes and have learned more than I thought possible. It’s at that point when I think I have seen all there is to see… Learned all there is to know… I turn around twice and I hear discussion about something new or my inbox is full of articles leading me down new paths of information.
The Basics
1) Self – Healing, Rotating Mat
Any mat will do but this is the one I use…and I use it a LOT!
2) 45 cm Rotary Cutter
I have no recommendations regarding one brand over another but the one shown above is what I use every. day.
3) 2.5″ x 12.5″ Ruler
These dimensions are not a hard and fast rule. Many prefer a 6″x 12+” or 8″x 12+” but the one I use is a good middle-of-the-road size that I use 90% of the time. I also have a 6″ x 24″ ruler for larger cuts of fabric.
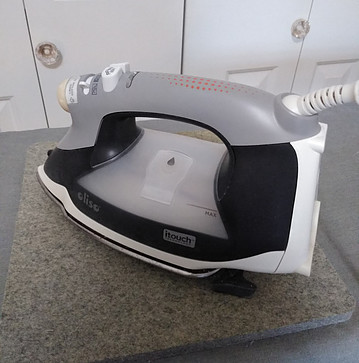
4) Oliso Iron / Dritz Mini Iron
Any iron will do however, when piecing a quilt top, an iron is used more than the sewing machine. I’ve been using my Olisio (scroll down for that image) for almost 5 years for ironing everything. For those small projects such as applique or those tiny 3″ quilt blocks, a smaller iron is a must.
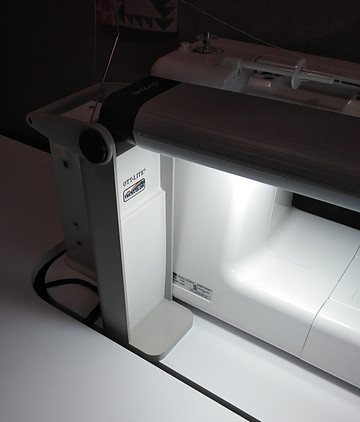
5) Ott Desk Light
Light is everything. You can have every tool, top shelf notions and machines but if you aren’t able t see what you’re doing, none of those wonderful gadgets will help make you a successful quilter.
Again, the brand name is not important this is just the one I’ve had for about 15 years. It provides clear daylight and I’ve yet to change the bulb!
To Starch or Not to Starch
While fabric starch is not normally considered a sewing notion, the technique and process of starching fabric before sewing – as I’ve learned the hard way – has become a step I will never pass up again. Ever.
I’ve ignored this important first step for WAY too long.
My first response when listening to and talking with others who starch their fabrics would be a loud, agonizing and exasperated sigh with eyes rolling toward heaven with the hope of receiving some form of divine intervention to save me from this conversation. (There also exists the camp that washes, dries AND starches their fabric before beginning a quilt – I don’t have the energy for that in this post!)
Each encounter would leave me scratching my head and asking, “Who really has time to starch, hang, wait to dry and press before making the first cut?”
Answer: All of us do!
Based on my experience, I have determined starching to be as necessary as actually purchasing fabric and acquiring the basic notions I’ve listed above!
Do it just once and you’ll be like me – wondering why you hadn’t bitten the bullet and done it so much sooner.
The headaches this one step prevents…especially when piecing smaller cuts of fabric that are cut with, as well as against, the grain.
Let’s assume you are now convinced of the power of starch but don’t know where to begin. Over the past few months I’ve acquired a mix and match of different techniques from Lisa Bongean and Leah Day and here are the techniques that work best for me:
1. Starch. A quick Internet search will reveal a multitude of products used however, what I’m happy with so far, is just plain fabric starch from a can.
I began my fabric starching journey with Faultless Original Finish and had every intention of continuing with that same product. However, when I ran out and needed a new can, and needed it in a hurry, I went to the small grocery store near my home but the only starch item on the shelf was the Faultless Heavy Finish starch. I’ve been using it with very good results and I’m not noticing any difference between the two products.
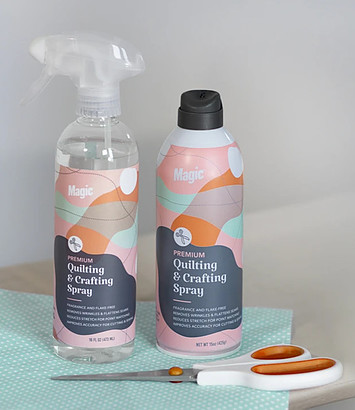
Update: When visiting Faultless. com I came across this new product:
Magic Premium Quilting and Crafting Spray.
The next time I need to purchase spray starch I’m going to give this a test drive. I’ll get back and share my results and see how this product compares with the others!
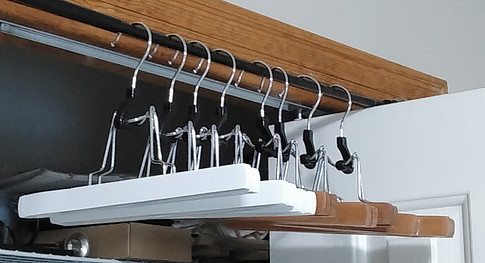
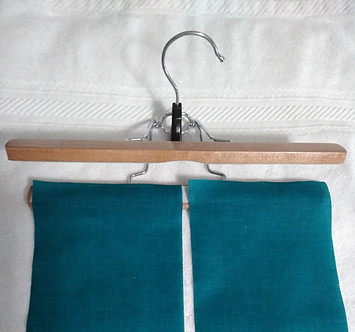
2. Hangers. Specifically, trouser hangers.
This type of hanger keeps the fabric flat eliminates the bend or roll in the middle of the fabric when hung over a small round bar or dowel rod.
3. Iron & Wool Pressing Mat:
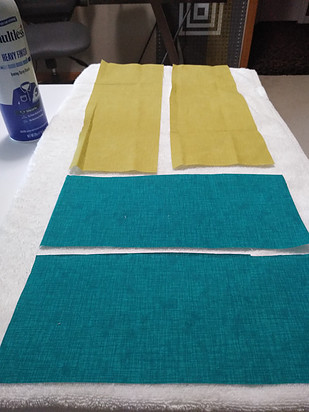
4. Large, Thick Towel: There isn’t usually a lot of over spray but you will use a LOT of starch and the more towel available t absorb the extra the less mess to clean up later.
The Process:
Each piece of fabric is sprayed with a LOT of starch – it is actually DRENCHED in starch. Take a look at Lisa Bongean’s video (if you haven’t already) and you’ll see what I’m talking about!
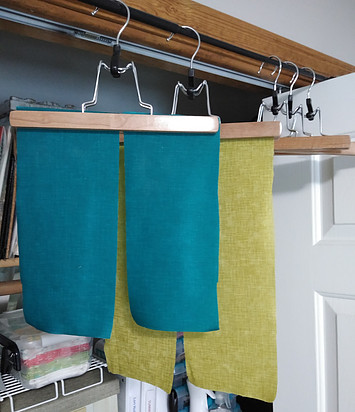
Next, place the ends of each piece of fabric between the hanger bars, close and hang until dry. Usually about an hour or less.
Once the fabric is dry, press it on a wool mat from the wrong side.
This helps to bind the starch with the fabric and eliminates the need
to re starch later.
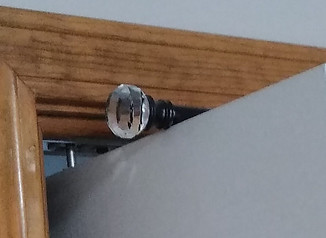
I could have easily hung these hangers over one of the clothes rods in my laundry room but to save time and to keep everything in one room I placed an adjustable curtain rod over the tops each set of opened bi-fold closet doors.
If you are like me and space is a premium, give this a try. Another option would be to install a tension rod between the opened bi fold doors and hang the hangers there. This would give you more space and would allow you to prepare more fabric at once.
Still in Doubt?
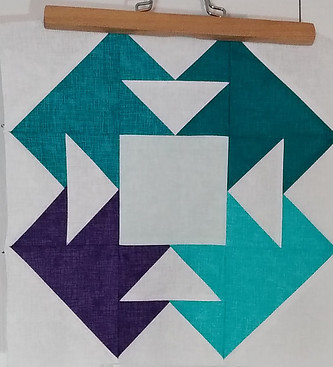
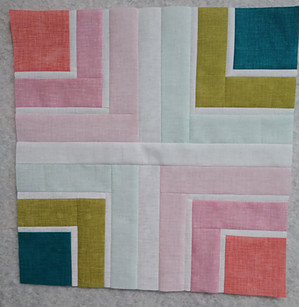
Below is an example of Block #3 from Summer Sampler 2021 – Vintage Restyle QAL:
It’s not bad, but could be much better. The darker teal and salmon squares and white borders are not uniform size and the sashing between the blocks does not lay flat – even after two separate ironing. The darker colored fabrics were starched, the lighter colored ones including the white, were not.
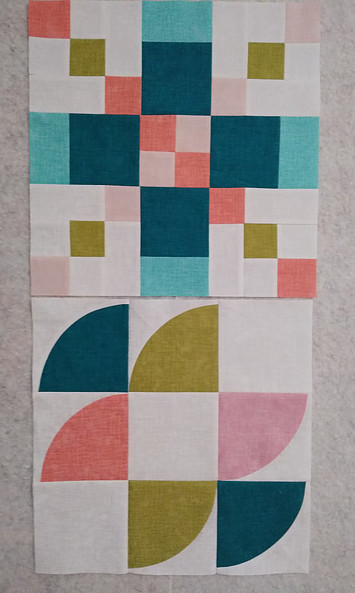
Blocks #1 and #2 are shown below. Though not perfect, the pints and curves would not have all come together so well had I not starched all the fabric first:
After all is said and done, starching fabric before sewing is really not that time-consuming.
Once you go to the trouble of choosing your fabric, gathering all the tools, finding time and locating space to begin a quilt top, the last thing you want is a date with Jack… the seam Ripper!
Next Post:
1) More Must-Have tools and techniques
2) Update on the Secret Garden quilt
3) Update on the Summer Sampler 2021 Vintage Restyle QAL.
Leave a comment and let me know what projects you’re working on!
Have you had the chance to try the new Magic Quilting and Crafting Spray? If so, let me hear your thoughts!
