

To the Summit and Beyond
The past weeks have been a series of many starts and stops. Like climbing a mountain – taking a break now and then to survey the landscape, catch my breath, plan my next move then climb some more. Reaching the mountain’s summit and feeling like the descent back to sea level would be smooth sailing – or so I thought!
What could be quicker and easier than sewing a series of squares and rectangles? The short answer: automation.
It seems anytime I become involved in a tedious, time-consuming task my mind begins to wander into the realms of “how can I make this easier”. Nothing like lining up and nesting seams of little squares and rectangles to provide fuel to turn the wheels of innovation.
Earlier I was reading on social media management tools = strategies to automate the posting process of content into social media accounts. There also needs to be a way to automate aligning and nesting seams so it is not only less time intensive but more accurate than my seams are turning out to be.
Its a Fine Line Between Here and There
On the topic of nesting seams I should mention there are MANY of these to line up. For the seasoned quilter this is no cause for concern – not a source of stress but for a beginner or an intermediate beginner, like me, it is a different story.
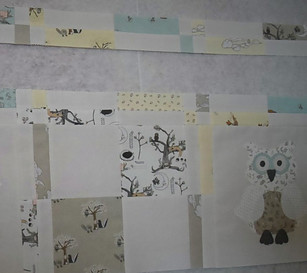
To be exact, 5 rows each contain 13 seams to be perfectly aligned and nested = 65. Of the remaining 4 rows, 2 rows each have 9 seams and 2 rows have 6 seams = 18 + 12 = 30 which gives us a running total of 95 seams to be perfectly (or near perfectly) aligned so when sewn together the seams form a straight line.
We haven’t yet considered the number of seams we’ll have to match up when putting all the rows together. Once the top is pieced and all rows are sewn together the remainder of the process, if using a sewing machine to quilt and bind, goes rather fast.
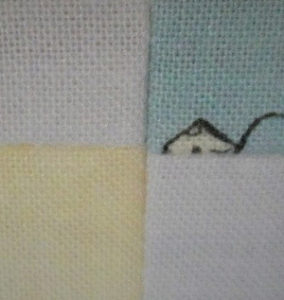
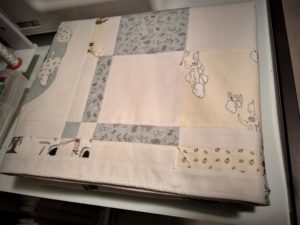
The image below shows in greater detail the individual rows as well how the sashing is attached. (The narrow strips that run horizontally between the wide rows as well as between the larger blocks is called the sashing).
If You Can’t Automate, Simplify!
Until this tedious process is automated (and I feel somehow in the future it probably will be – if it hasn’t already) I have identified at least three ways this entire process could be simplified.
1) Create one continuous 2″ strip between the rows of blocks. This would eliminate the need to nest so many seams. In fact, the only seams to worry about are the (6) large four-patch blocks.
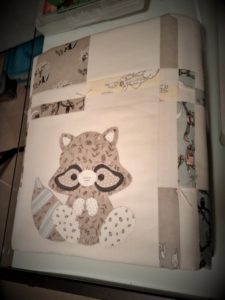
2) If greater visual interest is desired, sew one continuous rectangle of the print fabric between each of the smaller four-patch cornerstones as instructed in the original pattern.
3) The four-patch corner stone could be replaced with a single square of contrasting or background fabric.
Pieced and Quiet
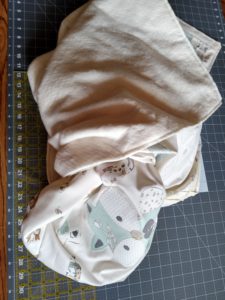
Once the quilt top is pieced it is now time to turn my attention squaring the top and pinning the top to the batting and backing. This makes the quilt sandwich.
To get a better idea of this process I’m including a few pictures:
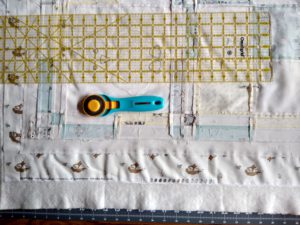
Using a large cutting mat, 6″ x 24″ quilt ruler and rotary cutter:
- The top is squared
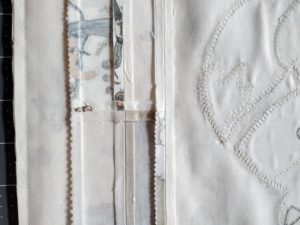
- Safety pins are used to “baste” or attach all three layers (top, batting and backing) together.
- The outer edge is stitched 1/4″ from the edge of the top – all the way around leaving a 5″ opening. The ruler is used again and placed on the 1/4″ stitch line as a guide for trimming.
The Fun Begins
Twist and Turn
This brings the inside out
To reveal this!
The opening at the bottom is closed with quilt clips and ready to be top stitched around the perimeter of the entire quilt. This not only closes the opening but creates a nice smooth edge.
You will also notice a couple of other techniques I used to simplify the finishing process.
The First: Rather than adding a separate binding to the edge I elected to create the quilt sandwich which allowed the edges to be sewn then turned outside in. The top stitching creates a binding effect and takes much less time.
Second: The actual “quilting” is done by tying knots using embroidery thread at 6″ intervals. I’m not sure this is easier or quicker than machine quilting but to me, it looks so much better – the overall effect is a softer, smoother appearance.
Originally, I did a few rows of machine stitching – 1) In the ditch and 2) In a diagonal pattern but didn’t like any of them. All that stitching created too much visual competition with the appliques and the fabric pattern.
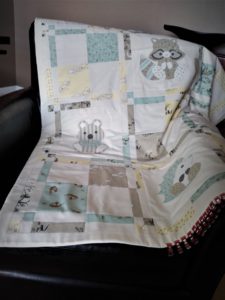
Ready for the Recipient!
Have you ever changed you mind like this when quilting? I would love to hear your thoughts on your own personal quilting process and how you decide on a machine quilting pattern and how do you decide to machine quilt vs hand quilt vs tying.
Hi
I have always wanted to start quilting but never seem to get round to it. I have started several projects and then into the cupboard it goes.
But reading you article as made me want to get all those pieces out and complete what I started. Because you mentioned about completing the top row first and the rest will go easier. This got me thinking that this is what I was doing wrong, Firstly I was sewing by hand and secondly I was just patching the pieces together adhoc without any planning.
I am so glad that I came over to your site because as simple as it seems to me now i was not doing that. Also using a strip is a really good idea and will save me more time.
Thank you for your detailed instructions and will be in tune for the next part.
Hi Jennifer
Thank you so much for stopping by! I think a lot people end up UFO’s (UnFinished prOjects!) in their cupboard due to lack of planning ahead. Quilting alone already seems so time consuming so the last thing many people want to do is spend even more time planning out a project but it does mean the difference between a finished and unfinished project!
That blanket is super cute by the way! Perfect present. I’m going to have to tell my mom about this since she loves quilting. She actually goes to this 55+ club & they have all the supplies for her. I’ll have to see if she knows how to do this so she can make different kinds of quilts. This looks easy enough for me to learn. It would be a great bonding experience if we got to do it together.
Hi Rachel!
Thank you for your comments! This was a fun one to make!
Quilting with your mom would be a lot of fun also! Since it has been a couple of months since I started this whole process if you are interested in how the “critters” were made go here. I go into more detail to show the applique process and what specific tools and techniques I use.