Part 1 of 2
“I wish I knew how to make a quilt…can you teach me?”
“If I start to make a quilt, what supplies do I need?”
“Is quilting expensive?”
“How long does it take to make a quilt?”
Anytime I’m involved in a conversation and topic turns to quilting, the above are just a sampling of the questions I hear from those who are quilt -curious.
What follows is Part 1 of a 2 part series to answer these questions and if you’re serious about making your first quilt, I am here to get you started!
Questions 1 and 2 above are relatively easy to answer.
Answer: Yes, I can teach you to make a quilt however, you first need to understand what exactly a quilt is and the process that goes into making one.
It IS a process. It takes TIME, PATIENCE, and PERSEVERENCE.
Most of all, it requires an understanding that mistakes will be made. Once you accept and understand the journey ahead and that mistakes are your teacher and not a sign to quit, you will have acquired a skill that will take you places you never thought possible.
You can also watch excellent tutorials on You Tube. A few of my favorite channels: Missouri Star Quilt Co., A Quilting Life and The Fat Quarter Shop. There are however, many, many more. Spend a little time on You Tube and discover a quilter that speaks to your style and skill level.
Anyone Can Quilt However, Quilting Is Not For Everyone
Before starting a quilt, you need to first fully understand exactly what a quilt is.
Generally speaking, a blanket refers to a whole cloth covering that is usually woven and consists of one only layer of material.
Blankets can be easily mass-produced and their price points reflect the level of skill and effort required to manufacture, market and distribute. This is largely the reason people choose a blanket, comforter, bedspread or duvet as a bed covering.
A guilt takes an ordinary bed covering to an entirely different level.
Same Thing But Different
Yes, a quilt is technically a covering, but with a couple of distinct differences:
1) It is made from three separate layers of material.
2) Making a quilt is an entirely different process.
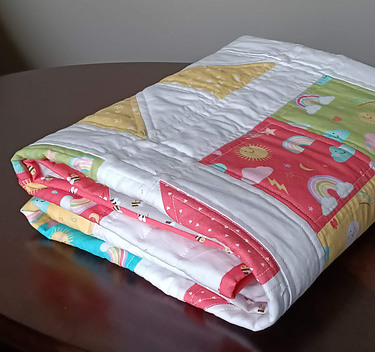
In its simplest form, one solid piece of material, can be used to make the quilt top. However, that only 1/3 of the quilt. The other two layers, the batting (the middle) and backing – the back of the quilt, need to be added and all three layers stitched together before it can be called a quilt.
The element that gives a quilt it’s appeal comes from the arrangement of multiple pieces of fabric sewn together to create the quilt top.
It is precisely this aspect, (which, by the way, are the first steps of quilt making), that can make or break your experience.
Stuff You Need
Once you are comfortable with the fact that your first quilt top requires you to sew together many pieces of fabric the fun can begin!
Must Have Items
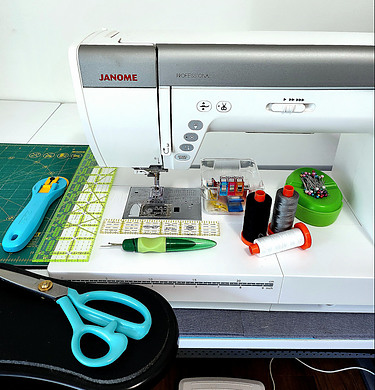
Before you do anything, obtain these items first:
1. Sewing machine – it doesn’t need to be fancy, it just needs to work!
2. Iron and ironing board
3. Scissors, rotary cutter and cutting mat.
4. Thread
5. Seam ripper – spoiler alert: this will be used a lot!
6. 12″ x 2 1/2″ ruler.
7. Straight pins and/or clips.
Below are images of the items I use every. day.
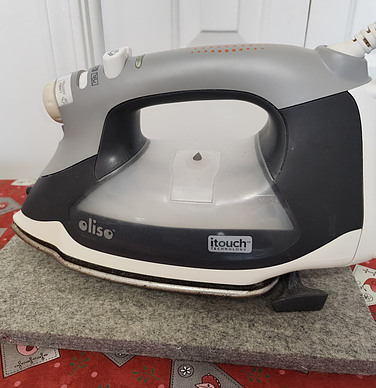
I’ve included an image of my iron as it cannot be stressed enough the importance of a good iron. In fact, an iron is as necessary as the fabric and sewing machine. So much so, that, in my opinion, an iron should be included with every sewing machine purchase.
A few notes about the items I have listed above:
1. The 12″ green Olfa cutting mat rotates. When you are using smaller pieces of fabric, this is a total godsend. The rotating aspect is not a luxury…it is an absolute necessity.
2. When it comes to thread, I always use 40 wt. cotton thread – Aurifil is my favorite.
3. The Oliso brand iron is not what is important here – there are better ones on the market (and usually the older the iron the better it works!) but I like this particular iron because of the anti-scorch safety feature. I’ve had this one 6 or 7 years and have had no problems with it whatsoever.
To get a better idea of the importance of these basic items, take a look at an article I published while back that offers specific tips for successful piecing here.
Let The Fun Begin
Once you’ve checked off all the items from the list above now it’s time to dive into the fun part!
Choosing fabric and a pattern for the first time quilter is a daunting task and, unless you already have fabric and a pattern in mind, I recommend a much simpler approach.
1. Start with a manageable sized project – wall hanging, placemat, baby quilt.
2. Purchase pre-cut fabric – a layer cake (10″ squares) or a charm pack (5″ squares).
All the fabrics will coordinate with one another and the stress of accurately cutting each piece is eliminated.
The bigger the fabric squares, the easier.
3. Sew the fabrics into a basic patchwork design. For added variety and contrast, use white or a coordinating solid color between each print. This is also a technique used to make the printed fabric go farther.
Let’s Keep It Simple
I think a fun first quilt project would be fast and easy would be to make a buffalo check quilted table topper.
Whether you like the buffalo check pattern, you need to learn the basics (achieving accurate cuts, sewing accurate seam allowance and matching points) and sew a project that you can finish in one day – maybe two. The longer it takes to achieve success, the less likely it is you will want to try anything more complicated – or any quilt at all.
This is the mistake many people make – they bite off more than they can chew, not realizing how tough the meat is, will spit it out and say, “never again”. The bite was only too tough because they didn’t take the time to first cut it into manageable sized pieces!
For this quilt you need only three colors – Black, white and gray, pre cut into 5″ squares.
For this example however, I’m using 5″ squares – 30 total: 9 black, 6 white and 15 gray.
If you choose another color scheme, the ratio of gray (or medium color ) to dark to white is as follows = 2:1:1.
Or,
2 yds of medium to
1 yd of black and
1 yard of white.
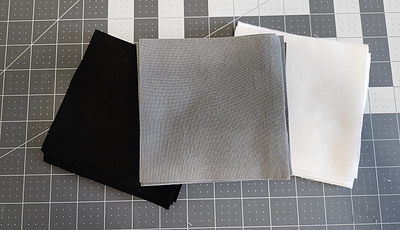
The sequence of each step starts here:
1. Sew a black square to a gray square. Make a total of 9 pairs.
2. Sew a gray square to a white square. Make 6 pairs.
* All seam allowances are 1/4″*
The image below shows how I use a 1×5 ruler to line up the needle to make sure the needle is exactly 1/4″ from the outside edge of the presser foot. As long as the edge of the fabric lines up with the edge of the presser foot and I do this CONSISTENTLY, I should not have to over-use the seam ripper later on!

This how things looked after chain piecing all the pairs together – it’s kind of a mess, right?
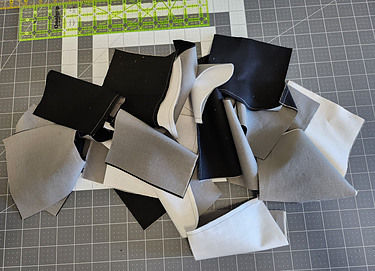
Below is a close-up view of the ‘chain piecing” technique I use every chance I get. It is a HUGE time saver. All you’re doing is continuously feeding one fabric pair after another under the presser foot without stopping. Once all the pairs are sewn, you simply cut the thread between each pair:
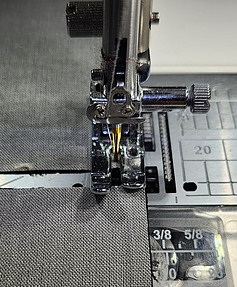
Next, open the pairs of squares and iron the seam open. Ironing the seams open (vs to one side, or the dark side) is another HUGE time saver. Open seams are 1,000X easier to match than those that lay to one side.

The image below shows what every quilter / person who pieces quilt tops hopes to achieve: that perfect point in the center where all four seems meet up. This is achieved two ways: 1) With consistent, accurate cuts of fabric and every seam sewn with the exact same seam allowance, and 2) Practice…lots of practice.
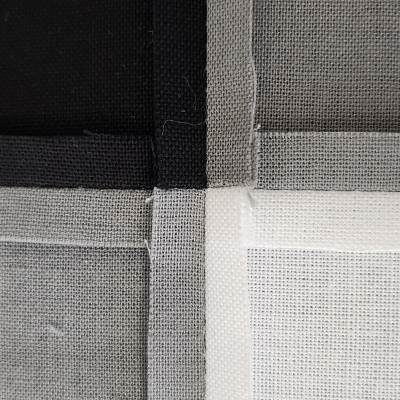
Let me back up a bit and show you the progression of putting the pieces together to reach the point you see above.
Three sets of pairs (black and gray) were sewn end to create a row of 6 squares in alternating colors. The same was done with the next row of white and gray pairs.
Line up the rows so all colors alternate
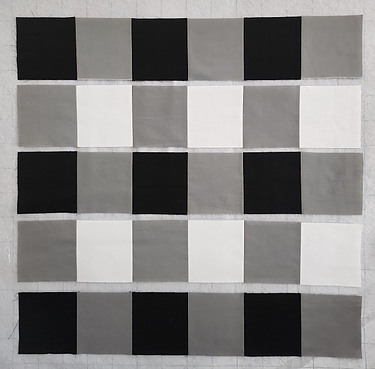
With right sides together, sew two rows together, matching the seams. For a first attempt, this does not need to be perfect but if you do make a mistake and seams don’t line up, just take a look at where things went off the track and use that information to prevent that mistake again.
That’s how it’s done. Sew. Rip out. Re-sew. Make a note of the mistake. Try again. Wash, rinse, repeat.
When all 5 rows are sewn together, this is how it looks:
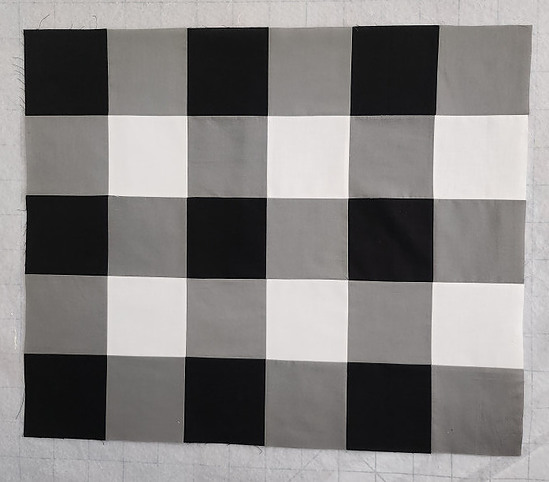
To be a super simple quilt top, I have to admit I did rip out a couple of seams. I wasn’t looking for absolute perfection but when the seams are misaligned by 1/4″, that’s too much for a pattern like this. This misalignment will stick out like a sore thumb and be the FIRST thing you see. If I had used a busier print, the misalignment would have been barely noticeable.
Keeping It Simple Part 2
Q: Can making a small buffalo check quilt be any simpler?
A: Yes, it can.
When I’m in need of serious inspiration and fool-proof information and instruction, my go-to quilter is Rob Appell of Man Sewing. In this tutorial he uses a different technique that is not only easier but appears to be a better way to make sure your points will line up.
If you aren’t familiar with Rob, I encourage you to visit page on the Stitchin Heaven website. He gives quilting a masculine twist that is both fun and unexpected.
The Quilt Top is Made – Now What?
Stay tuned –
In Part 2, I will:
1) Show you how to create the quilt sandwich, (or jump ahead and read this to see what all the fuss is about!)
2) Explain how to do the actual ‘quilting” of those layers,
3) Add binding and,
4) Answer questions 4 and 5.
Stay Cool and Make Something Today!

