And by that I mean you can put just about everything your heart desires…
Maybe even the kitchen sink…
INTO THIS BAG
The Beatle Bag from Abbey Lane Quilts
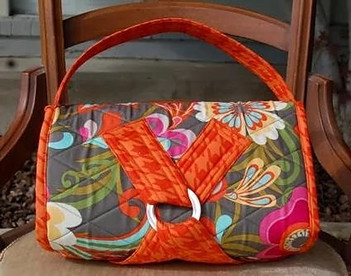
The designer/author’s intent was to create a bag large enough to hold and organize a wide range of sewing notions yet be easy to carry. This combination of genius design and fun fabrics was just too much for me to resist.
A feew weeks ago I attended a quilt show hosted by one of our local quilt guilds. My initial intent was to look at all the beautiful quilts on display and vote for my favorites in each category, purchase raffle tickets ( to win a feather weight Singer sewing machine – never got a call so I’m assuming by now I didn’t win…) and sample a few goodies at the bake sale table.
I did all of that and, (because aside from being an obsessive fabriholic I am an obsessive to the 10th power bag lady as well), purchased the pattern, vinyl inserts and pin cushion filling to be used to construct this super cute Beatle Bag:
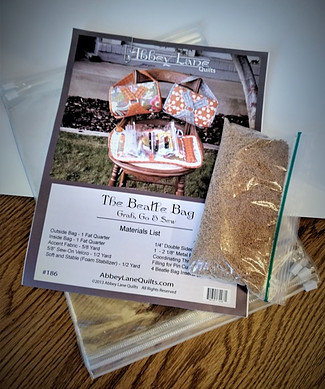
The pattern/kit was second-hand – I’m thinking a left over or unused kit from a previous class/workshop sponsored by this quilting guild sponsoring the show. It was in perfect condition and at half-price!
Sadly, I wasn’t able to find any fabric at the quilt show that I couldn’t live without (something that almost never happens!)
What I was able to do however, was rummage through my sewing closet and gathered the items and place in a storage bin as seen in the image below:
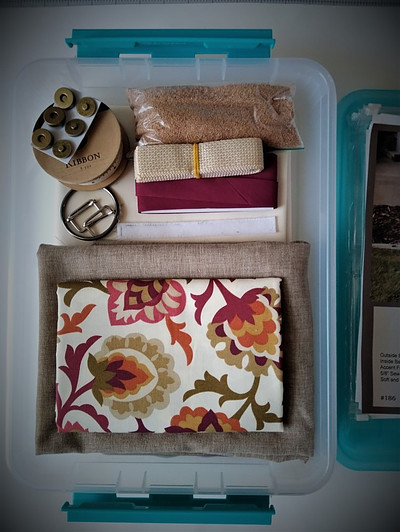
As with any project, organization is key. I would suggest obtaining a shallow plastic bin with a lid before you decide on what fabrics and other tools you will need. If you are having trouble locating what you need when you need it, a project like this is likely to become a UFO – UnFinished prOject.
Also, for many of us, this will not be a quick, get-it-done-in-an-hour or even “in-a-weekend” project. You will no doubt do – as I did many, many times, get it out, work on it a while and “life” will happen that requires you to put your project aside to come back to later. Being able to throw everything into a box and put a lid on it makes it much, much easier to return to and finish.
Now, with that out of the way let’s take a quick look at my “Finished-Is-Better-Than-Perfect Beatle Bag”!
FABRIC SELECTION:
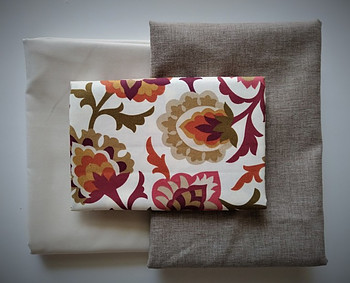
A multi colored cotton print for the outer bag, a cream colored cotton for the inner bag and a linen look cotton for the straps, handles and accents.
GENERAL MATERIALS LIST:
Outside Bag – 1 Fat Quarter 1/4″ Double Sided fusible Webbing
Inside Bag – 1 Fat Quarter 1 – 2 1/8″ Metal Ring
Accent Fabric – 5/8 Yard Coordinating Threads
5/8″ Sew-On Velcro – 1/2 Yard Filling for Pin cushion
Soft & Stable Foam Stabilizer – 1/2 Yard 4 Beatle Bag Inserts
WORDS OF CAUTION
If / when you purchase the pattern you will notice I made more than a couple of substitutions in the materials list. This was done primarily to try to use what I had on hand without making a special trip to a fabric or craft store.
You will also notice I made a few modifications to the instructions. The reason? I have an uncontrollable unwillingness to follow instructions. period. It’s one of my main weaknesses and it interferes and prevents me from getting anything finished in a reasonable amount of time.
When I see just about anything, the wheels in my brain begin turning trying to figure out a way to: a) make the item easier to construct, b) make it more functional, c) visualize it in another color or d) just because I have to do things my way.
WORDS OF WISDOM
Hindsight really is 20/20 and after constructing this cute little bag “my way” I encourage you to read and follow the instructions as they are written. Janice and Marcea at Abbey Lane Quilts have been doing this sort of thing way longer than I have – they know what they are doing and are very good at what they do! Just read and follow their instructions and you should have no trouble whatsoever creating your very own Beatle Bag!
HOW AND WHY
I had maybe one quarter yard of “Soft and Stable” foam stabilizer but oodles of quilt batting so the batting was used in place of the foam stabilizer. I intend to make another Beatle Bag and when I do I am considering using one-sided fusible quilt batting. That would be perfect for a small project like this. The basting is accomplished by ironing the batting to the wrong side of the outer layer. It’s a real time saver – basting takes much less time and as a bonus, you get to start the “quilting” aspect very quickly!
My original intent was to use a 2 1/2″ unfinished wood ring (in place of the 2 1/8″ metal ring) however, as the construction of the bag progressed I elected to follow that particular instruction and went with the metal ring.
I would have much preferred to use sew on Velcro – and I know there is a roll of it somewhere in my sewing closet but every attempt to locate it ended in complete failure. Miraculously I was able to find a small scrap that would work for the “pin cushion”, but I needed quite a bit more than that.
This is all it took to get the wheels in my mind turning once again – “what can I use to substitute”. And in my search I was able to locate a few magnetic snaps left over from a previous tote bag project. Not the best solution – I’ll get into that later, but offers an alternative when the primary object is to get this bag finished in a reasonable amount of time.
I also considered using ready-made quilt binding however, after much deliberation I decided the straps, handles and binding should all be the same.
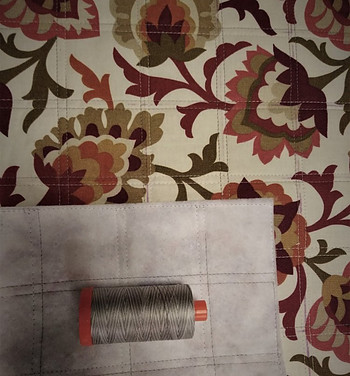
In the image directly below is a quick look at the outer bag – notice the thread and grid quilt pattern used:
I seemed to me a geometric grid quilt pattern would serve to “tame” the busy movement of the print pattern. A variegated medium gray thread appeared to be the best solution to blend in when using so many colors and high contrast hues.
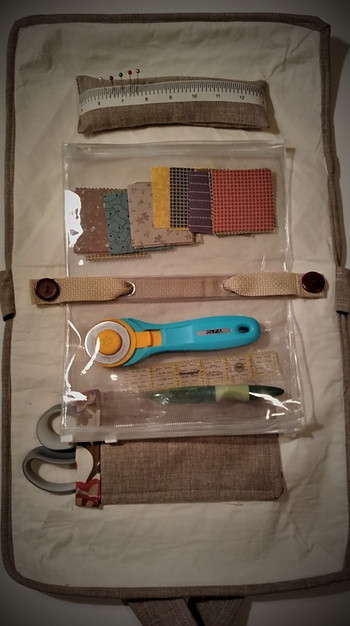
Once the inner and outer pieces were quilted, the straps were sewn in and the binding attached to the edge, the inner accessories (pin cushion, scissors pocket and vinyl inserts) could be added. I’ve included a few of my own tools for demonstration purpose but believe me, this little bag will hold a lot more!
I can see this as a perfect way to carry and store a quilt-as-you-go project. Small items can be easily tucked away in a pocket and a partial lap or baby quilt can easily be folded and tucked inside. Once the bag is rolled up and the outer strap is fastened everything inside stays secure and in place.
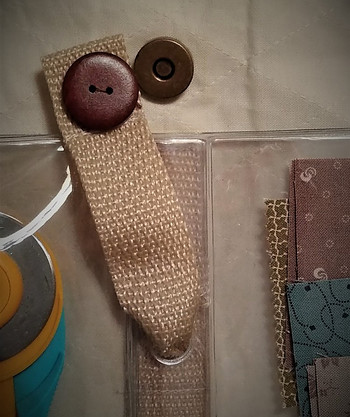
Below is a close up of the magnets I used and how they were placed at each end of the webbing used to attach the zipped vinyl inserts: I sewed a button over the magnet to hide the ugly metal clips and give the appearance of a true button.
I alluded to this earlier, these magnets are not a perfect solution. I’m not crazy about Velcro however, these magnetic snaps are just a bit too large and too heavy for this project. Their fixed position doesn’t allow you to adjust the tension of this inner strap – something that would be useful to keep the insert taught to accommodate to changes in size and weight of the contents within the vinyl pouches.
You will notice this same technique – using a magnet covered with a button – was used in place of Velcro on the outer strap:
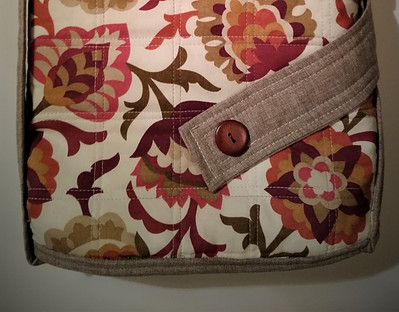
And finally,
my
“FINISHED-IS-BETTER-THAN-PERFECT”
BEATLE BAG!
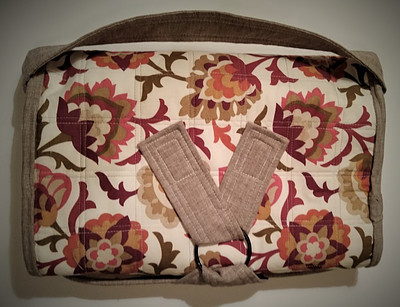
It is obvious binding is not my strong point but in all fairness, I’m not sure the fabric I used was entirely suitable for binding – it stretched SO easily and was prone to fraying. Taking a closer look at this I think the best option for me is to choose a fabric that allows me to use a ready-made seam or quilt binding tape.
IN SUMMARY,
Making this Beatle Bag was the most fun I’ve had in a long time! The instructions were clear, easy to read and easy to follow. And not only was this a fun project it is one that allows you expand you skill set or enhance skills you already possess.
WHAT I LEARNED:
1. More about the characteristics of different fabrics.
2. The importance of following the instructions and make as few substitutions and modifications as possible.
3. How to make a pocket that is even on both THE bottom and top corners.
4. I need more practice cutting and sewing binding and straps.
5. That I CAN’T WAIT to make another Beatle Bag as soon as I have the chance!
If anyone else has made this or a similar bag designed to hold EVERYTHING I’d love to hear your comments and experiences. Is this the type of bag you often use? On a scale measuring degree of difficulty, where would you place construction of this bag?
And as always, feel free to post an image of any type of organization bag you have made!
Hello. In my various day to day activities, I have recognised and acknowledged the need for a bag large enough to hold my considerable amount of property and I believe that I have now found one suitable for me. Thanks for such an enlightening article, it has been of great help.
Nothing does it or gives you the satisfaction knowing you have a bag that can hold literally anything or even take extras or things you did not have any plans or budget for. There have been few times I went out with my sister shopping and she will go with bags not too big and she would complain. Having a bag that puts your mind at rest when you go shopping and can even take extras is definitely a very good one. I’m sure sis would like that.
Hi i like your post it is really good i like to have strong bags when i go shopping most of the plastic bags break far to quick so it is very good idea to carry a bag that wont break that has strength.
I like your post it is common sense you are not spending so much when you have that bag with you.