
This is Where it all Begins –
Creating the quilt top.
You attend a quilt festival, visit your local quilt shop or surf the web when a colorful fabric creation captures your eye. Your first thought, “I want to make that quilt” is quickly followed by a myriad of questions: Is a pattern available and do I need one? If so, where can I locate this pattern? How much fabric will I need? Do I need any special tools, techniques or skills to follow the pattern to make this quilt top?
Next thing you realize, the idea of cutting fabric into strips, squares and rectangles then sewing them back together is not as quick and easy as it looks. Even with a pattern – and not all patterns are created equal – there may also be a little math involved. How large a quilt top make? Do I add a border or do I let the binding be the border and how will this affect the appearance of my quilt top?
Today, I will answer the questions crucial to starting your very first quilt and in return you will have the confidence to piece your first quilt top from start to finish.
Precuts
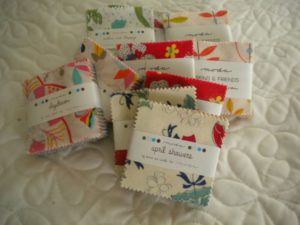
Using precut fabric will save you a LOT of time and hassle!
- The fabric prints are from one fabric line so they already coordinate – no spending hours trying to locate 10 -12 different fabric prints that may or may not go well together.
- Being from the same fabric line all the fabric used for your quilt top will be of the same “hand” – consistent weight, thread count and fiber content. This ensures consistency of the quilt top in terms of fading, shrinkage and durability.
- They are “pre-cut” which saves you time preparing a large piece of fabric to be measured and cut. Cutting fabric is probably the most intimidating aspect of the entire quilting and piecing process. Eliminating that stress is invaluable!
Pattern
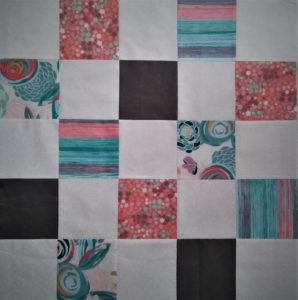
Our first quilt will be a simple layout (not a formal pattern) using a pre-cut fabric bundle known as a “Charm pack” and we will arrange those squares into a checkerboard-type pattern alternating a print fabric with a solid. This is how I officially began my serious quilting journey!
A charm pack typically consists of a stack of 42 pieces of fabric cut into 5” squares and for this top we will be using one print charm pack and one solid charm pack – approximately 84 pieces of fabric total.
Think of who you would like to make the quilt for – a friend, a baby, yourself – and choose a fabric suitable for your recipient. The solid charm pack will be a color that contrasts with the print – often white, off white, black or gray. You could choose a solid from a background color of the print but for this purpose I would avoid complicating things and go with a basic neutral.
Piecing
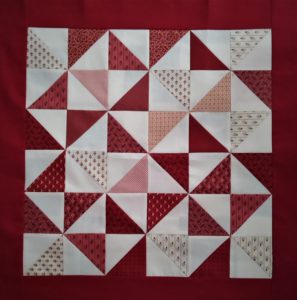
Now comes the fun part – deciding how to position your fabric pieces to create a pattern that is eye catching and visually pleasing. As you begin the layout you will soon notice the potential pattern designs are endless.
I like to use a design wall – basically a large piece of felt attached to a wall. The fabric squares will stick enough to let me easily move them around while giving me a good picture of what the overall quilt top will look like once it is sewn together.
To keep the print and solid squares evenly spaced throughout the quilt top each row will consist of an odd number of squares and rows. For our example, each row will consist of five squares (sewn side by side) with vertical seams. Next, each long row of five squares is sewn together making a horizontal seam.
Piecing the Row
A solid square is paired with a print and sewn together with right sides together.
Typically, a ¼” seam is sewn along one side. If your seam allowance is slightly larger or smaller no worries – what is important is consistency. EACH and EVERY seam needs to be the SAME WIDTH.
Continue sewing pairs of squares – one solid with one print for each horizontal row. That will be (2) sets of (2) squares sewn together with one left over. Attach the left over square to the end of the second pair.
Finally, sew the square pair set to the (3) square set and you have all five squares sewn together to complete your first row.
Repeat this same process for each of the remaining (6) rows of fabric squares.
Press the seams open. Yes, open. You may have read or were taught to press the seams to one side or “to the dark side”. Back in the day when quilt batting was not the quality product it is today, seams were pressed closed to prevent the batting from working out from between the layers of fabric. Today, that is not such an issue. Pressing seams to one side also involves creating a “pressing plan” and a few other unwanted and unnecessary headaches. That’s not what you’re here for – you want stress-free simplicity!
One word of caution when piecing together each row: Don’t be tempted to sew the squares in consecutive order – beginning with the first two squares then adding the third, then the fourth and ending with the fifth square. Don’t ask me why but when you do this the row will have a curved, bowed effect. It will not lay straight. Then when you are ready to sew the rows together vertically it will be almost impossible to get the seams to match up – which lead us to the final step in this process.
Row + Row = Quilt Top
The top is beginning to take shape.
Starting from the bottom, turn the bottom row over with wrong side showing and place on top of the row above. Pin in place, “nesting the seams” so each vertical seam is perfectly lined up with the vertical seam above. Sew along the length of the entire row.
Put that pair aside and repeat the same for next set of rows. Like sewing the squares together, there will be an extra row – go ahead and add it to the last pair of rows.
Press all the seams open.
Sew the first pair of rows to the second pair. Add to this the third pair and finally the last set with three rows.
Press those seams open, lay it out on a flat surface or up on your design wall and admire!
Pieced and Quiet
Now it’s time to give yourself and your machine a much needed rest and recap what you have accomplished.
Using a minimum of basic sewing/quilting tools:
- (2) Fabric charm packs – one solid and one print.
- Thread
- Sewing machine
- Iron / ironing surface
- Scissors
- Seam Ripper (optional)
- Design wall (optional)
You now have 1/3 of your quilt completed and can begin to plan the next steps: adding a border, backing and batting to create the quilt “sandwich” to be discussed in a following post.
Feeling comfortable and experiencing early success with this process is key to developing a long lasting and rewarding hobby or career as a quilter!
This information was so well written and easy to follow. You delivered on your promise, I am now confident that I can sew my own quilt.
Thank you so much for taking the time to read my post! So glad you found the information useful and the instructions easy to follow!