That’s right…BEFORE you begin your next Free Motion Quilt read through this post!
I have outlined THE best products and methods to make your free motion quilt project a complete success!
My last post described my end-of-summer ritual – finishing projects, cleaning, organizing and planning for fall/winter/Christmas projects. No big surprises here.
On the other hand, what has transpired over the past few days next has created a very surprising result.
It All Started With a Quilt Top:

When I finally finished piecing each of the 16 blocks for my Summer Sampler 2020 quilt top and sashed the blocks together I thought I was through with thinking, figuring and making decisions.
But no…oh no…the next step – deciding HOW to put together the quilt sandwich threw me right back to week 1 of this QAL!
It was naive on my part to think that choosing a color scheme for each block, deciding whether to follow the pattern or make a small “alteration” when piecing each block, making sure the color of one block flows to the adjacent blocks, making sure every block is trimmed to the same exact size, choose the sash color or colors and deciding if/how they will compliment each block, and determining whether to piece HST’s or use a solid square at each corner…would also mean the “hard” part of making this quilt was behind me.
In spite of all I did and accomplished since June 1st, before I’m able to officially call this Summer Sampler a quilt, a few more decisions need to be made. The first – and most important – deciding the best way to construct the quilt sandwich for this particular quilt.
To Pin or Not to Pin?
The process of making a quilt sandwich has come a long way in a few years. What used to be a difficult and tedious process of layering the top, the batting and backing while keeping each layer in place. Traditional methods to baste these layers ranged from hand basting with a needle and thread to pinning to using a spray adhesive between the layers.
Each method has it’s advantages and the method you choose largely depends on how you plan to quilt.
I’ve used all three…actually there is a fourth method but I’ll get to that later…and here are my opinions about each:
1) Hand basting with long stitches works well for a small quilt i.e., a wall hanging. If you have a quilting frame, you can hand baste and hand quilt any size quilt that the frame will hold. The basting stitches are easily removed after you quilt and you won’t have pins in the way while you either hand or machine quilt your pattern.
Bonus: While researching basting techniques for this article I discovered “Water Soluable Thread“! It dissolves in cold water and can be used to hand or machine baste a quilt sandwich…wow.

2) Curved Basting Pins and the Kwick Klip tool (both shown below) is a great technique if you have a large surface that allows you to stabilize the layers around the perimeter of a large tabletop with large clips or fabric friendly vice grips. The fabric has to stay taught and smooth as you pin from the center outward.


After watching this video of Rob Appell of Man Sewing this has pretty much been my go-to method for making a quilt sandwich of most every size.
3) Spray basting is another of my favorite techniques however, this requires basting outdoors in a very well ventilated indoor space. For a larger king or queen size quilt I’ve found it almost a necessity to have another set of hands – one person to spray and another to help smooth and position each layer.
I have spray basted large quilts by myself – it can be done but it is SO time-consuming.
4) My New Favorite Way to Baste: Basting Powder!


So far, this powder has delivered on every promise! I have discovered this to be especially useful if you are creating a quilt sandwich for a large quilt and there is no one around to help you.
A little goes a long way and there is absolutely NO SHIFTING of any layer and the adhesion lasts until you wash it out. Another bonus: it’s machine needle friendly!
Need more compelling proof? Take a look at this quick video by #The Quilt Show!
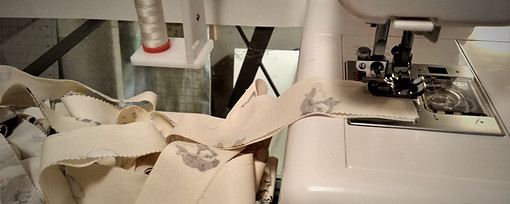
Since the pattern of this quilt top moves in many directions I decided free motion quilting would create the most visually appealing pattern. Another benefit of spray or powder basting – there are no pins or threads to get in the way of the quilt pattern. You have total freedom to use any free motion quilt pattern you like!
My quilt sandwich is made and I’ve outlined a stipple pattern in the center of the quilt and set up my machine to begin free motion quilting.
I’ve stitched barely a quarter of the way when I have flash back from the last time I free motion quilted a large quilt and quickly remember why I haven’t tackled this method since – it’s my sewing surface.
Although I have a silicone mat slider, the surface area just isn’t large enough to make this efficient.
Houston, I Have a Problem
I need a larger sewing surface and I need it ASAP.
This led to multiple online searches and an equal number of dead-ends.
The Solution
Trying to take a ‘big picture” approach, I determined the best sewing table solution for me does not exist. I will need to make one (or even better, find someone willing to make custom sewing table). While that is always a possibility – even a probability, this particular problem requires a solution, like, now.
The Surprise
Which lead me to make a quick, spontaneous and semi impulsive decision to make this purchase:
The Eclipse Ultra Sewing Table
The definition of now in a pandemic? 10 days! I can actually live with that – delivery times with all other options resulted in a much longer timeline. IKEA tables I was interested in were either Out-of-Stock or stated, “This item isn’t available for delivery” and if delivered, would still require a degree of modification and assembly before use.
This is not the perfect solution but is better than a) what I now have and b) nothing.
Stay Tuned!
I will:
1) offer a thorough review of this table and 2) Show and Tell my completed Summper Sampler 2020 Quilt!