Have you ever opened or downloaded a quilt pattern and felt completely overwhelmed by the pages of instructions, measurements, diagrams, and unfamiliar terms, you’re not alone. So many times, I would purchase a pattern and be so filled with the excitement of creating the quilt shown on the cover. My mind mentally choosing fabrics and quilting thread. Then, with just the turn of one page, I’m suddenly overwhelmed.
Anticipation is quickly replaced with one overriding question, “what have I gotten myself into?”
This is the moment when I need to remember that even an experienced quilter will occasionally find themselves staring at a pattern and wondering where to start.
The good news is that quilt patterns are much simpler than they first appear. Earlier this year I took a quilt pattern writing course (and have plans to take another early next year). If nothing else, I learned how a quilt pattern is organized.
Being able to share with you the basics of how a quilt pattern is written will allow you to read them with greater confidence. Happy quilters spend less time feeling confused and more time enjoying the creative process!
Why Quilt Patterns Look Complicated
At first glance, a quilt pattern can seem like it’s written in another language. There are abbreviations, cutting charts, fabric requirements, and diagrams all packed into a few pages.
But quilt patterns are simply road maps.
Rather than reading them like a book from beginning to end, think of them as a set of step-by-step directions designed to guide you through your project.
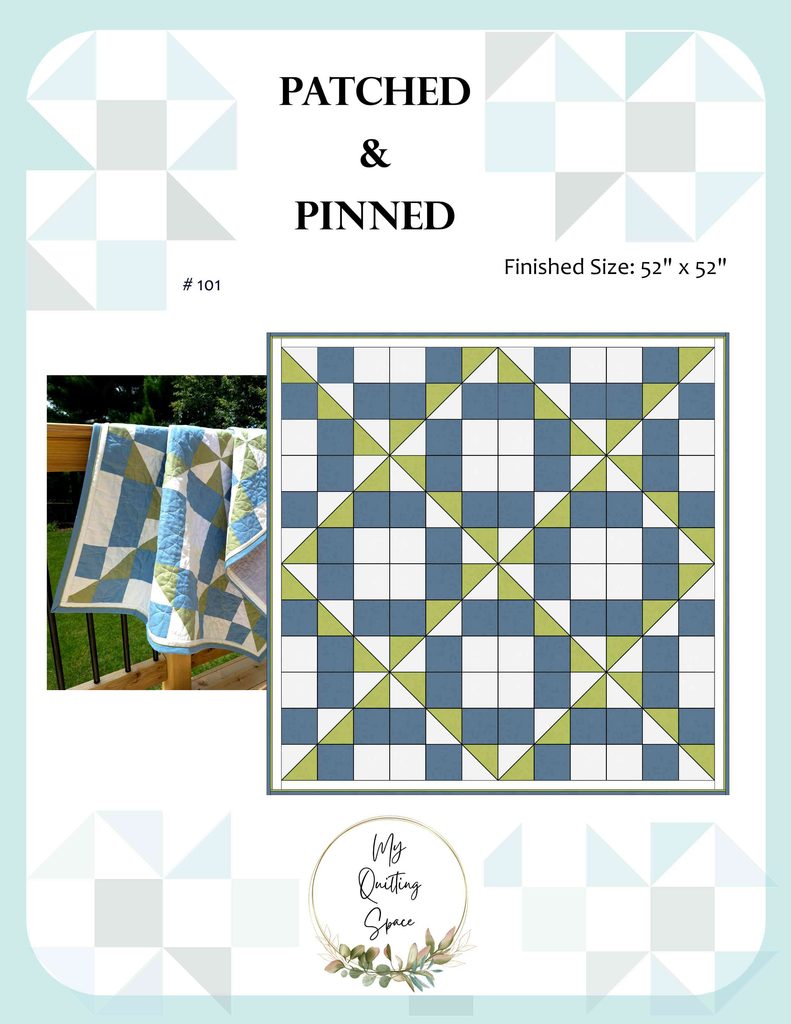
As I help you navigate reading a quilt pattern, I’ll be using pages from my own pattern.
Start With the Materials List
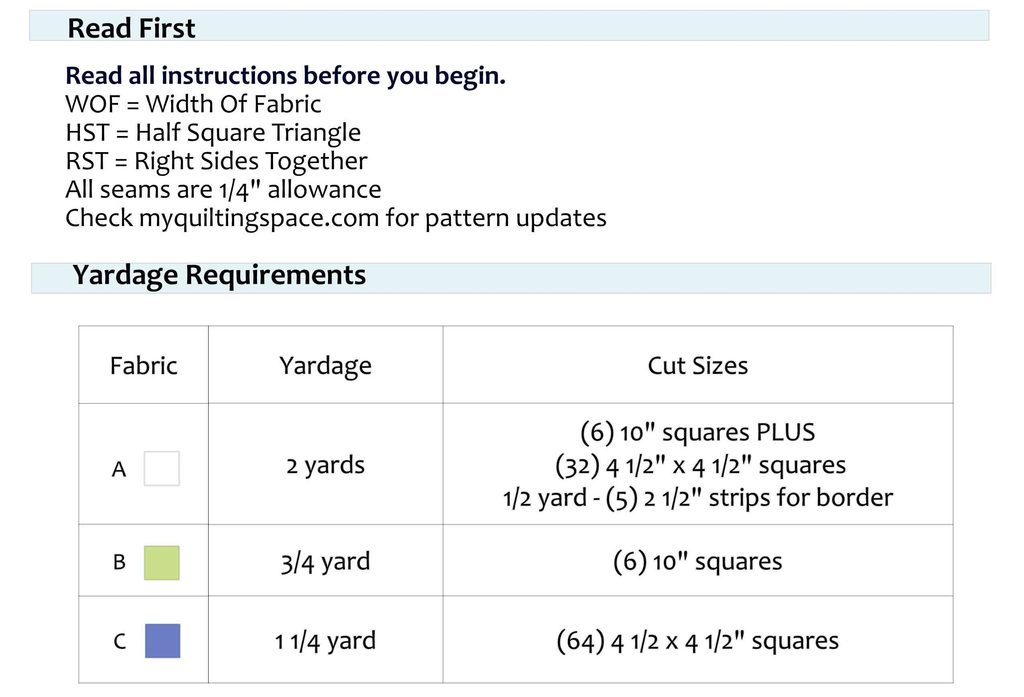
Before you thread your machine or cut a single piece of fabric, look at the materials section.
Most patterns will list:
- Fabric requirements
- Batting size
- Backing requirements
- Thread suggestions
- Recommended tools
Take a few minutes to compare the list with the supplies you already have.
This simple step helps prevent frustration halfway through your project when you realize you’re missing something important.
Understand the Finished Size
One of the first details you’ll find is the finished quilt size.
Knowing the finished dimensions helps you determine:
- Whether the quilt will fit its intended purpose
- How much backing and batting you’ll need
- If you’ll need to resize the design
Many beginners skip this section and later discover their quilt is much larger or smaller than expected.
Learn Common Quilting Abbreviations
Patterns often use abbreviations to save space.
Some common examples include:
- WOF = Width of Fabric
- RST = Right Sides Together
- HST = Half-Square Triangle
- FG = Fat Quarter
- SA = Seam Allowance
If a pattern includes an abbreviation key, keep it nearby as you work.
Don’t worry about memorizing every term immediately. You’ll naturally learn them as you gain experience.
Read the Entire Pattern Before Cutting
This may be the most valuable tip in the entire article.
Many beginners jump straight to cutting instructions, only to discover later that they misunderstood a step. However, I should point out that this is my greatest downfall. I’m hardly a beginner but I have to use quite a bit of restraint and discipline to take the time to sit, read and fully comprehend the instructions before bringing out the rotary cutter!
Reading the full pattern first helps you:
- Understand the construction process
- Spot potentially tricky sections
- Plan your sewing sessions
- Avoid costly mistakes
Think of it as reading the recipe before baking a cake.
Pay Close Attention to Cutting Instructions
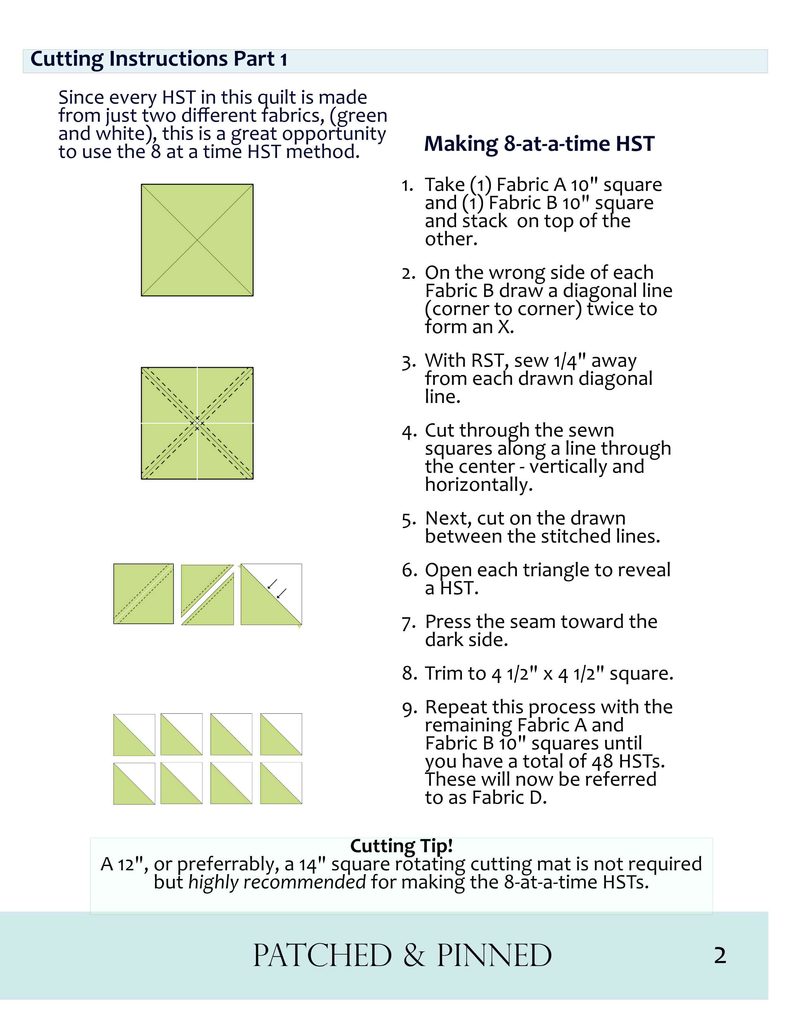
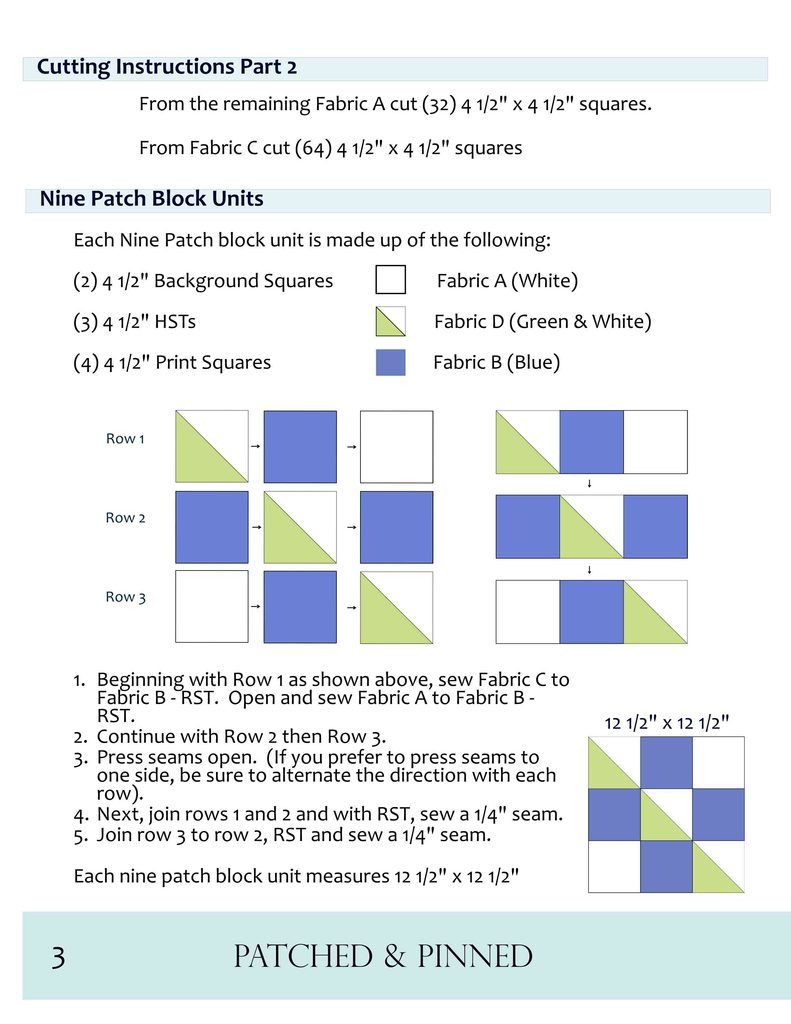
Accurate cutting is the foundation of successful quilting.
When reviewing the cutting section, highlight or check off pieces as you cut them.
Pay special attention to:
- Piece dimensions
- Fabric assignments
- Quantity required
- Special notes for directional prints
A simple mistake during cutting can affect every step that follows.
Study the Diagrams
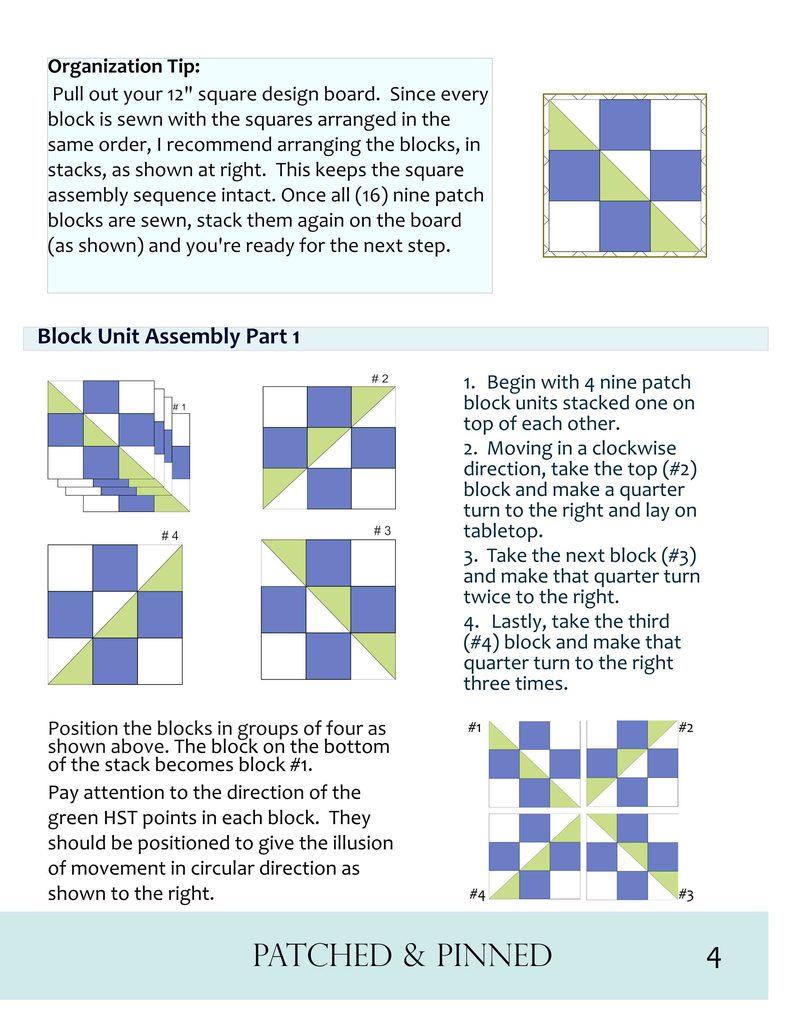
Many quilters learn visually, which makes pattern diagrams incredibly helpful.
If written instructions seem confusing, compare them with the illustrations.
Diagrams often clarify:
- Block orientation
- Fabric placement
- Assembly order
- Unit construction
Taking a few extra moments to study the pictures can save hours of unpicking stitches later.
Understand Seam Allowances
Most quilt patterns assume a precise 1/4-inch seam allowance.
Even small variations can cause blocks to finish at the wrong size.
If your pieces aren’t matching up correctly:
- Check your seam allowance first.
- Measure completed units as you go.
- Make small adjustments before continuing.
This one habit can dramatically improve your accuracy.
Break the Pattern Into Manageable Steps
Instead of viewing the pattern as one giant project, divide it into smaller tasks.
For example:
- Read the pattern.
- Gather materials.
- Cut fabric.
- Make individual units.
- Assemble blocks.
- Join rows.
- Add borders.
- Quilt and bind.
Completing one step at a time feels much less overwhelming and helps build confidence.
Don’t Be Afraid to Make Notes
No one understands every quilt pattern the first time they read one.
Confidence develops with experience.
The more patterns you work through, the more familiar abbreviations, construction methods, and quilting terminology will become.
Give yourself permission to learn as you go. Every quilt is an opportunity to build new skills and become more comfortable with the process.
Final Thoughts
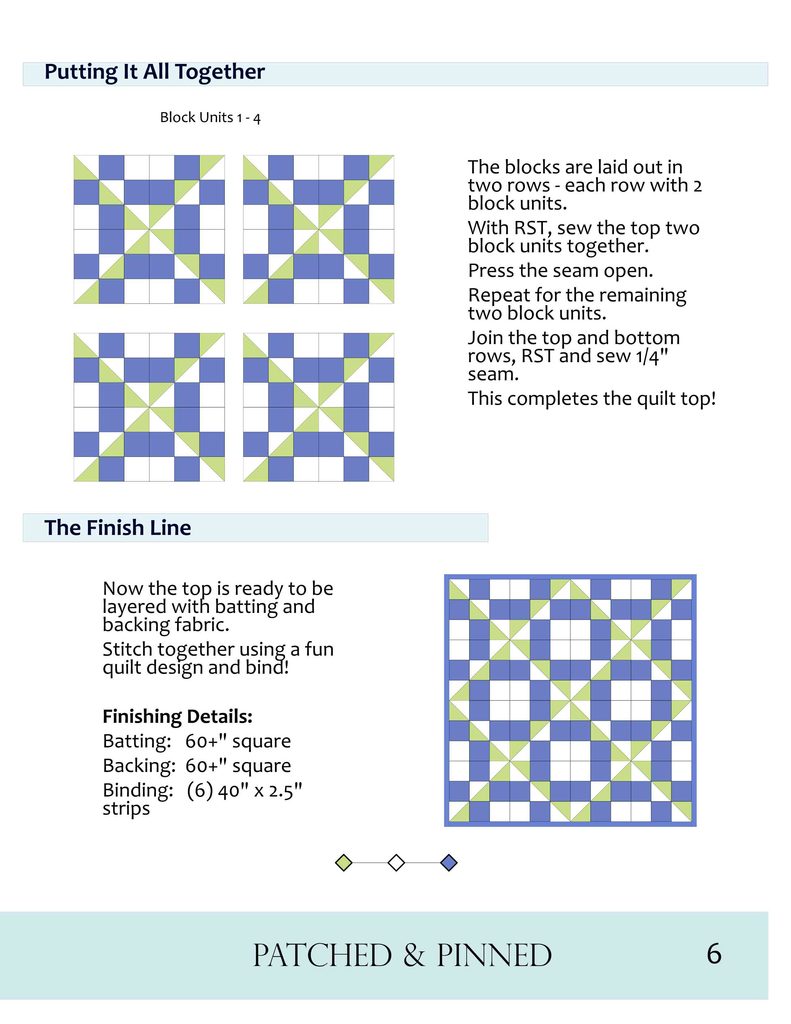
Reading a quilt pattern doesn’t have to feel intimidating. By taking time to understand the materials list, cutting instructions, diagrams, and construction steps, you’ll be able to approach your first pattern with confidence.
Remember, patterns aren’t tests. They’re simply guides created to help you succeed. Start with a beginner-friendly design. The pattern I’m using as an example in this post is the perfect pattern for your first quilt. Go here and scroll down to the link and get your FREE pattern!
To help you stay on track I’ve created a checklist you can easily download here. It lists the items I review anytime I’m beginning a new quilt pattern. After you’ve downloaded it, print it off and check off each item as you go down the list. Take advantage of the extra room on the page to write notes or list questions you need clarified before you make that first fabric cut.
Take it one step at a time and enjoy the journey of creating something uniquely yours.
If you decide to use my pattern for your first or next quilt, I’d love to see it! Share it here in the comments or post on IG and tag @susansquiltspace.